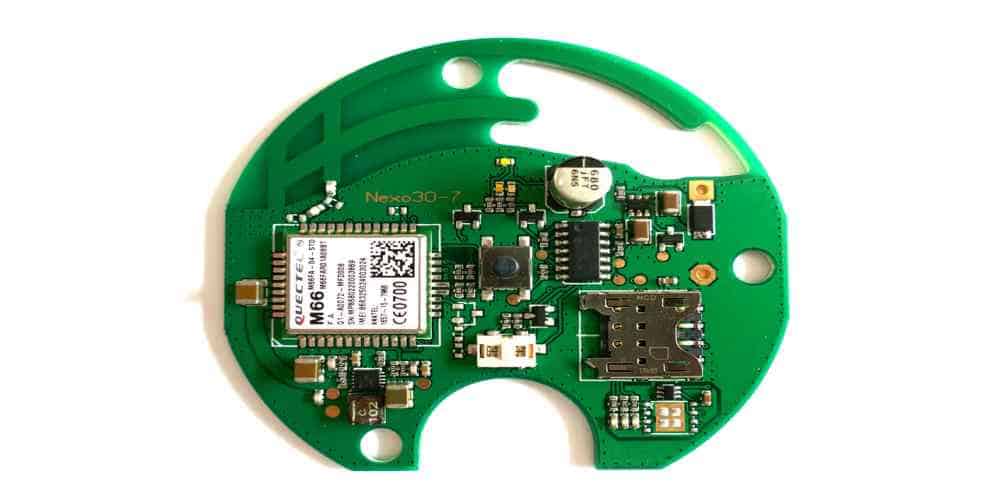
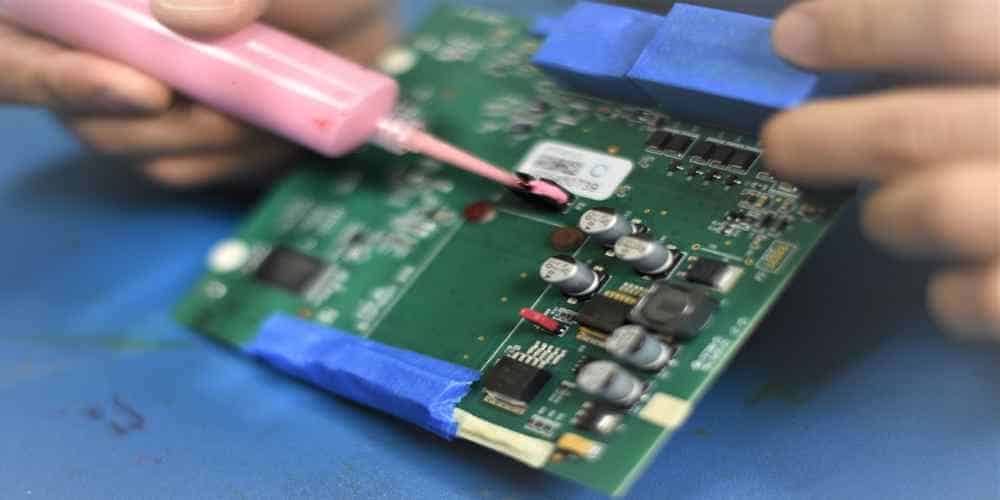
So, you know how almost every electronic device these days has a Printed Circuit Board (PCB) inside, right? Think about your smartphones, laptops, medical devices, and even your car’s electronics. We constantly expose these PCBs to all sorts of things like moisture, dust, temperature changes, and mechanical stress. That’s where PCB encapsulation comes in to save the day. It’s the superhero shield for your circuit boards, keeping them safe from harm and working at their best.
PCB encapsulation is a vital process in the electronics industry involving the application of protective materials to printed circuit boards (PCBs). This process aims to safeguard delicate electronic components from harsh environmental conditions, such as moisture, dust, and chemicals, while enhancing their mechanical strength and durability.
The significance of PCB encapsulation is paramount, given its vital function in guaranteeing the durability and dependability of electronic devices. Furthermore, by establishing a protective shield against contaminants and physical strain, encapsulation contributes to the sustained performance of PCBs across various sectors, including consumer electronics, industrial equipment, and aerospace systems.

Understanding PCB Encapsulation
Picture your PCB like a delicate piece of artwork. Like you’d protect a painting with a frame and glass, PCB encapsulation gives your circuit board a protective layer to keep it safe. It’s like a cozy little blanket shielding your PCB from all the things that could harm it.
PCB encapsulation is a distinct process that entails the application of protective substances, such as epoxy, silicone, or polyurethane, to the exterior of a printed circuit board. This layer functions as a protective barrier, shielding the board’s sensitive electronic elements from harsh environmental influences, such as dust, moisture, and corrosive agents. Moreover, encapsulation bolsters structural or mechanical strength, reduces vibration, and aids in temperature regulation, guaranteeing the equipment’s peak performance under diverse circumstances.
How it improves the longevity and reliability of circuit boards
Encapsulation significantly contributes to the longevity and reliability of circuit boards by:
- Providing a barrier against contaminants: Encapsulation materials prevent corrosive substances from reaching the PCB, reducing the risk of short circuits and component degradation.
- Enhancing mechanical strength: The added encapsulation layer reinforces the PCB, protecting it from physical damage during handling, installation, and operation.
- Reducing vibration and shock: Encapsulation dampens vibrations and absorbs shock, minimizing the risk of component failure and solder joint fractures.
- Improving thermal management: Encapsulation materials can help dissipate heat more effectively, preventing overheating and extending the lifespan of temperature-sensitive components.
Common applications for encapsulated PCBs
Encapsulated PCBs are in wide use across various industries, given their enhanced durability and performance. Some common applications include:
- Consumer electronics: Devices such as smartphones, tablets, and wearables benefit from encapsulation, as it safeguards them against daily wear and tear, moisture, and temperature fluctuations.
- Automotive industry: Encapsulated PCBs are essential in modern vehicles, with applications in engine control units, powertrain systems, and infotainment systems, ensuring reliable performance in harsh environments.
- Industrial machinery: Encapsulation protects PCBs in equipment exposed to dust, chemicals, and extreme temperatures, ensuring the continuous operation of production lines and minimizing costly downtime.
- Aerospace and defense: The high-stress conditions and stringent reliability requirements of aerospace and defense applications demand encapsulated PCBs for mission-critical systems, such as avionics, communication systems, and radar equipment.
The Types of PCB Encapsulation Materials
Now, when it comes to encapsulating your PCB, you’ve got some options. There are different materials you can use, each with its pros and cons. Some of the usual suspects include epoxy, silicone, urethane, and acrylic. Epoxy is a crowd favorite because it’s tough, long-lasting, and sticks like glue (literally!). Silicone is another popular choice, especially when you need something that can handle high temperatures and resist chemicals. Urethane is known for its flexibility and resistance to wear and tear, while acrylic is often used for its easy application and budget-friendly price tag. Choosing the right material for your project depends on your specific needs and factors like operating environment, mechanical strength, cost, thermal management requirements, and the specific application.
PCB encapsulation epoxy
You’ve probably heard of epoxy before, maybe in the context of strong adhesives or even DIY projects. But did you know it’s also a superstar when it comes to encapsulating PCBs? That’s right! Epoxy has some fantastic properties, making it a top choice for keeping circuit boards safe and sound.
PCB encapsulation epoxy is a popular choice for circuit board encapsulation due to its excellent adhesive properties, mechanical strength, and resistance to chemicals and moisture. Epoxies are thermosetting polymers that form a strong, rigid bond when cured.
Other common encapsulation materials
- Silicone: These are super popular for being flexible, having awesome heat stability, and not putting too much stress on components. They’re perfect when you’re dealing with high temperatures and do a great job keeping out moisture and chemicals. The only catch is they don’t have the same level of mechanical strength as epoxy and might be a bit pricier.
- Polyurethane: This option sits as the best of both worlds, sitting right in the middle of silicone’s flexibility and epoxy’s rigidity. It has pretty good mechanical strength, reistant to chemicals, and boasts solid thermal properties. While polyurethane might be a bit trickier to remove than silicone, it’s usually easier on your wallet compared to silicone-based materials.
Step-by-step guide to encapsulating a circuit board
Preparation

First things first – you’ve got to prep your PCB for encapsulation. This step is super important because it ensures that the encapsulation material will adhere properly and provide the best protection possible. So, how do you prepare your PCB? Start by making sure it’s squeaky clean! Remove any dust, dirt, debris, or grease from the surface with a suitable cleaning agent like isopropyl alcohol. And while you’re at it, make sure your components are properly soldered and connected. After all, you don’t want to trap any issues under that shiny new protective layer.
Material Selection
Next up, you’ll need to decide on the right encapsulation material for your project. Remember how we talked about different encapsulation materials earlier? Well, now’s the time to choose one that fits your needs. Consider factors like your PCB’s size, shape, operating environment, and the specific properties you need from the encapsulation material (e.g., high temperature resistance, flexibility, etc.). Don’t forget to weigh the costs, too – some materials may be more budget-friendly than others.
Mixing, application and curing
Finally, it’s time to get down to the actual encapsulation process. Depending on your chosen method and material, you might need some special equipment, like a dispensing machine or a curing oven. If you’re going the epoxy route, you’ll usually start by mixing the epoxy resin and hardener together. Then, you’ll apply the epoxy to your PCB using a method like potting, where you pour the epoxy into a mold around your PCB, or conformal coating, where you brush or spray the epoxy onto the board. Once your epoxy is in place, you’ll need to let it cure, which might involve some time in a curing oven or just waiting for it to harden at room temperature.
Inspection
After the curing process, visually inspect the encapsulated PCB to verify complete coverage and check for any defects, such as bubbles, voids, or uneven coating.
In summary, the main steps are:
- Preparation.
- Material selection.
- Mixing (if applicable).
- Application.
- Curing.
- Inspection.
And there you have it! Your PCB is now encapsulated and ready to face the world. With the right preparation, materials, and techniques, you can give your circuit boards the protection they need to keep your electronics running smoothly for years to come.
Circuit Board Encapsulation Techniques
Here, we introduce common techniques for circuit board encapsulation, including potting, glob top, and conformal coating.
Potting
This technique is like giving your PCB a nice, cozy bath in a protective material, like epoxy, polyurethane, or silicone. To do this, you’ll pour the material into a mold or container surrounding your PCB. Once the material cures, your PCB is completely enclosed, offering excellent protection from moisture, dust, electrical interference, and mechanical stress. The downside? Potting can be a bit bulky and heavy, so it might not be the best choice for super lightweight or compact applications.
Conformal coating
Imagine painting a thin, protective layer onto your PCB – that’s basically what this technique is all about. You can use a brush, spray, or even a dipping process to apply the coating, which usually consists of materials like acrylic, silicone, or urethane. Conformal coating is great for providing a lightweight, low-profile layer of protection that still allows easy access to components for repairs or modifications. Remember that it might not be as durable or resistant to extreme conditions as some other techniques.
Glob top
Glob top is like the middle ground between potting and conformal coating. With this technique, you’ll apply a thick, dome-like layer of material (often epoxy) over specific components on your PCB. This provides targeted protection for sensitive parts, like IC chips or sensors, without adding too much bulk or weight. This method is cost-effective and suitable for protecting individual components while maintaining a low profile and overall weight. Glob top is a popular choice for applications where space is limited, but keep in mind that it doesn’t offer full coverage for your entire PCB like potting or conformal coating would.
Encapsulation with Cast Resin
Last but not least, we have encapsulation with cast resin. This technique is similar to potting, but instead of using a mold or container, you’ll pour a liquid resin directly onto your PCB. The resin then hardens into a solid, protective layer that conforms to the shape of your board and components. Cast resin encapsulation is a great option for applications that require a more flexible, impact-resistant protective layer. Just be aware that, like potting, it can be a bit heavier and bulkier than conformal coating or glob top.
Factors to Consider When Choosing Encapsulation Materials and Techniques

Having explored the different materials and techniques for PCB encapsulation, you might be wondering, “How do I choose the best one for my project?” Don’t worry! There are a few key factors you should think about when making your decision, and we’ll go through them together.
PCB Size and Shape
Consider the size and shape of your PCB. Is it a big, chunky board or a tiny, intricate one? Depending on the dimensions, some encapsulation methods might be more suitable than others. For instance, if you’re working with a compact or lightweight device, a bulky potting technique might not be the best choice. Instead, you could opt for a conformal coating or glob top, which tend to be lighter and less intrusive.
Operating Environment
Think about the environment your PCB will be operating in. Will it be exposed to moisture, dust, chemicals, or extreme temperatures? Different encapsulation materials offer varying levels of protection against these factors, so choose one that can handle the specific challenges your PCB will face. For example, if you need protection against high temperatures, a silicone-based encapsulant might be a better fit than an acrylic one.
Thermal Management Requirements
Another thing to consider is how your PCB handles heat. Some components can generate a lot of heat during operation, and it’s crucial to manage that heat effectively to prevent damage or performance issues. When choosing an encapsulation material, consider its thermal conductivity – that is, how well it can transfer heat away from your components. Materials with higher thermal conductivity, like certain epoxies or silicones, might be more suitable for applications with demanding thermal management requirements.
Cost Considerations
Don’t forget about the budget! PCB encapsulation materials and techniques can vary in cost, and it’s important to strike a balance between performance and affordability. For instance, while a high-performance epoxy might offer excellent protection, it could also be more expensive than a more budget-friendly acrylic conformal coating. Make sure to weigh the pros and cons of each material and technique within the context of your specific project and budget constraints.

