Printed circuit boards; are manufactured by intricate machinery, usually called printed circuit boards (PCB) drills.
Accuracy is one of the top priorities while making PCBs. However, to ensure the final product’s quality, accuracy, and performance – proficient machinery is used during the entire process. In this article, we give you a deep insight into the manufacturing process of PCB hole drilling, its types, and some tips to follow during the process.
What is PCB Hole Drilling?
PCB drilling – Printed Circuit Board Drilling – is a process of digging holes, spaces, and excavations in an E-circuit board.
A variety of hole styles are drilled during the whole process of PCB drilling. These styles may vary in their types and usage. There are simple holes which may include micro, blind, buried, or thru holes. At the same time, component holes and mechanical holes are other types.
As the mandatory demand for precision, manual as well as laser-printed circuit board drills are being used to dig holes. Manual or automatic drilling rigs are also used to ensure the accuracy of boards. Some companies have drills with laser detection ability. This not only ensures accuracy but also corrects the diameters automatically if needed.
Stage of the manufacturing of PCB Hole Drilling
Drilling is one of the costly stages of creating a circuit board. Not to mention it is also a time-consuming stage. The reason is that this stage needs very keen measures to ensure the highest quality and accuracy of circuit boards.
The process of assembling a PCB is very complex and mainly consists of 20 essential steps. Once the raw material of substrate for the circuit board is cut to the desired size and thickness, drilling comes forward to do its part.
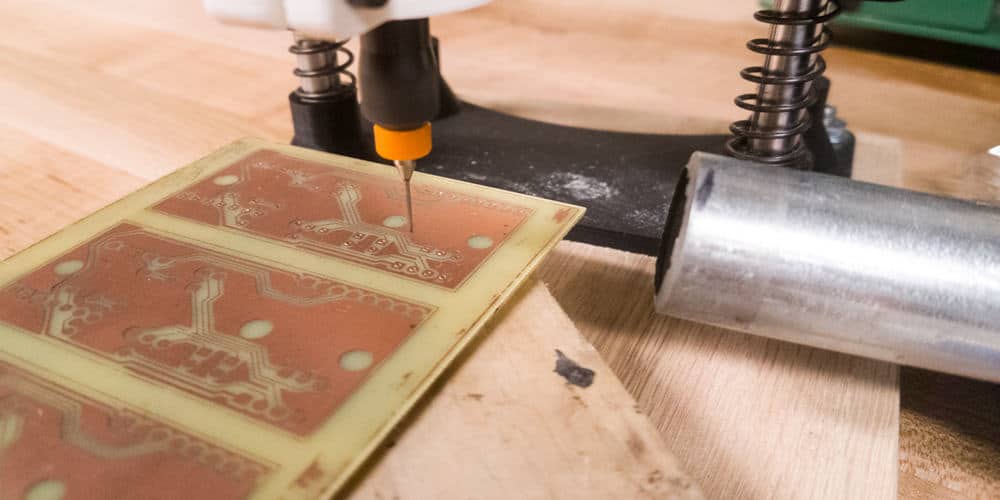
When the substrate is ready to be drilled, it then goes to a pre-programmed CNC machine. Tooling pins are used to hold the board during the process. Component mounting holes are drilled in the printed circuit board and go through accuracy measures. Then it splits the boards. Lastly, it goes through polishers which ensure the removal of particles while making its edges smooth.
Once the printed circuit board goes through all the quality and accuracy, the drilling process ends right here. The PCB is ready to move toward the next stage of the manufacturing process.
PCB Hole Drilling types:
1. PCB Hand Drill:
A Printer circuit board(PCB) hand drill is used to crave holes in the PCB. The PCB hand drill has a chunk on it which ensures the drill stays in its place. This chuck can either be tightened by an Allen key or wrench. This drill has its own unique packaging content and usage guidelines.
2. A Back Drill
A back drill PCB is usually used to create holes in PCB. However, these holes are further used for inserting wires mainly by hand. Then the surface of the PCB is cut with a sharp blade while uncovering the copper layer. This copper layer is removed by a cutter called a burr cutter. After this process, a back-drill PCB can be used electrically while connected to its main power supply circuit board.
3. Circuit Drill Bit
The Circuit board drill bit is a drill designed with a sharp point end and a flat surface. It is mainly used to create holes through which wires can be inserted and welded. For a better result, make sure to keep the flat face towards the surface so that it won’t move in any other direction. Ultimately, it gives a right-angle hole in the printer circuit board.
Tips for PCB Hole Drilling

PCBs are manufactured by drilling holes in a sheet of metal (copper or silicon). However, the drilling process requires keen measures to plan which part of the sheet and how much it needs to be drilled. To ensure the accuracy of the process of manufacturing PCBs without any damage to the sheet, here are some ensured tips and tricks that will help you thoroughly.
PCB Hole Drilling Pilot Holes
Drilling a pilot hole in the sheet is the very first step of any drilling. This ensures that the drill bit keeps its form and moves into the required manner of a pattern without losing its original track. A pilot hole can be created manually by using a mini hand drill or automatically by the drill press.
A pilot hole can easily be created by hand drill, while with a drill press, you need to take out drill bit heads from the tool one by one. Usually, the number of bits depends upon the size of the PCB to be drilled. For instance, if a 0.2 mm drill bit is used, one hole is enough to drag out the four easily. One thing to remember here is that this process usually leaves marks on the sheet of PCB as each drill bit head is removed.
· Straight PCB Drill
Drilling at a right angle is the best way to get precise results. Drill bits come in varieties of sizes. The sizes of the bits are as follows:
Wire gauge drill bits are usually used for creating holes ranging between 0.8 to 1 mm thick for inserting wires. Small drill bits are 0.7 to 2mm thick and used for craving holes. It also includes flat and round shapes. Medium drill bits range between 2 and 10mm thick and also come in flat and round shapes. Large drill bit used to create holes ranges from 5 mm and greater.
· Correctly sized
The size of the drill bit is very crucial in the process of manufacturing PCB. Ensure that the drill bit size you use is correct. It causes a severe problem, either if it is big or small. A big bit damages the sheet leaving no space for components, while small bits don’t allow them to pass the wire through it. That is why the correct size is important.
Conclusion
Anyone can make PCBs easily if they have the right tools and materials by their side. Making PCBs is a very useful skill that you can learn quickly. The right amount of knowledge, materials, and equipment help you to build PCBs right away at any time, as drilling is one of the most important parts of manufacturing PCBs. Hand drills, drill presses, and PCB solder stencils are the best drilling tools to create holes in PCBs.
