Prototype circuit board assembly is a critical process that enables the creation of electronic devices. It involves the assembly of electronic components onto a circuit board to create a functional device. The process of prototype circuit board assembly is complex and requires specialized skills and equipment.
The assembly process begins with the design of the circuit board, which is typically done using computer-aided design (CAD) software. Once the design is complete, the circuit board is fabricated using specialized equipment. The electronic components are then placed onto the circuit board using automated machinery or by hand. The components are then soldered onto the board to create a functional device. Prototype circuit board assembly is a crucial step in the development of electronic devices and is essential for ensuring that the device functions as intended.
Benefits of Prototype Circuit Board Assembly
Improved Efficiency
Prototype circuit board assembly offers numerous benefits, including improved efficiency in the manufacturing process. By creating a prototype circuit board, engineers can test and refine their designs before moving on to full-scale production. This process allows for the identification of potential issues early on, which can save time and resources down the line. Additionally, the ability to quickly iterate on designs means that engineers can refine and improve their products more rapidly, leading to better end results.
Cost Savings
Another significant benefit of prototype circuit board assembly is cost savings. By catching design flaws early on, engineers can avoid costly mistakes during full-scale production. Additionally, the ability to test and refine designs before moving on to full-scale production means that less time and resources are wasted on revisions and rework. This can result in significant cost savings over the long term.
Faster Time-to-Market
Finally, prototype circuit board assembly can help companies bring products to market more quickly. By identifying and addressing design flaws early on, engineers can streamline the manufacturing process and reduce the time required to bring a product to market. Additionally, the ability to quickly iterate on designs means that companies can respond more rapidly to changes in the market or customer needs.
Overall, prototype circuit board assembly offers numerous benefits for companies looking to improve efficiency, save costs, and bring products to market more quickly. By catching design flaws early on, engineers can avoid costly mistakes and refine their products more rapidly, ultimately leading to better end results.
Factors to Consider Before Prototype Circuit Board Assembly

When planning for prototype circuit board assembly, there are several factors to consider to ensure a successful project outcome. These factors include design requirements, budget constraints, timeline, and schedule.
Design Requirements
Before beginning the assembly process, it is essential to define the design requirements for the prototype circuit board. This includes the size, shape, and functionality of the board, as well as any specific components or materials that must be used. It is important to consider the intended use of the board and ensure that the design meets all necessary requirements.
Budget Constraints
Another critical factor to consider is the budget for the prototype circuit board assembly. This includes the cost of materials, labor, and any necessary equipment or tools. It is essential to establish a budget that is realistic and feasible, and to work within the constraints of that budget throughout the assembly process.
Timeline and Schedule
The timeline and schedule for prototype circuit board assembly are also important considerations. It is crucial to establish a realistic timeline for the assembly process, taking into account any necessary testing and revisions. It is also important to ensure that the schedule is feasible and that all necessary resources are available to complete the project on time.
In conclusion, when planning for prototype circuit board assembly, it is important to consider the design requirements, budget constraints, timeline, and schedule. By carefully considering these factors, it is possible to ensure a successful outcome for the project.
Prototype Circuit Board Assembly Process
Design and Layout
The first step in prototype circuit board assembly is to design and layout the board. This involves creating a schematic diagram of the circuit and then laying out the components on the board. The design and layout process can be done using software such as Eagle, Altium, or KiCad. It is important to ensure that the design is optimized for the intended use and that all components fit within the available space.
Component Sourcing
Once the design and layout are complete, the next step is to source the components. This involves identifying the required components and then ordering them from suppliers. It is important to ensure that the components are of the correct type and that they meet the required specifications. Common sources for components include Digi-Key, Mouser, and Arrow.
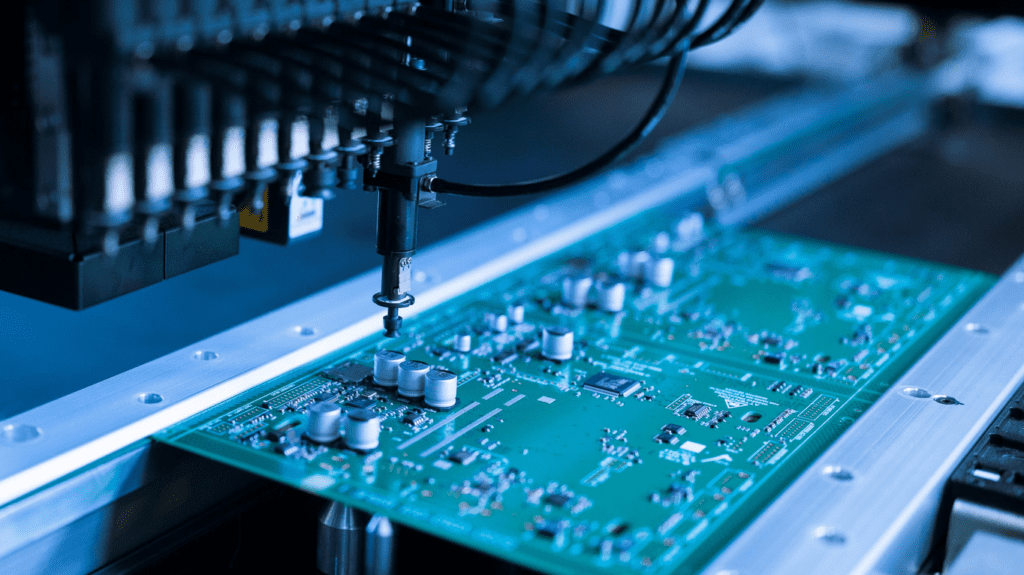
Assembly
Once the components have been sourced, the next step is to assemble the board. This involves placing the components onto the board and then soldering them in place. This can be done manually using a soldering iron or with the help of automated assembly equipment. It is important to ensure that the components are placed correctly and that the solder joints are of high quality.
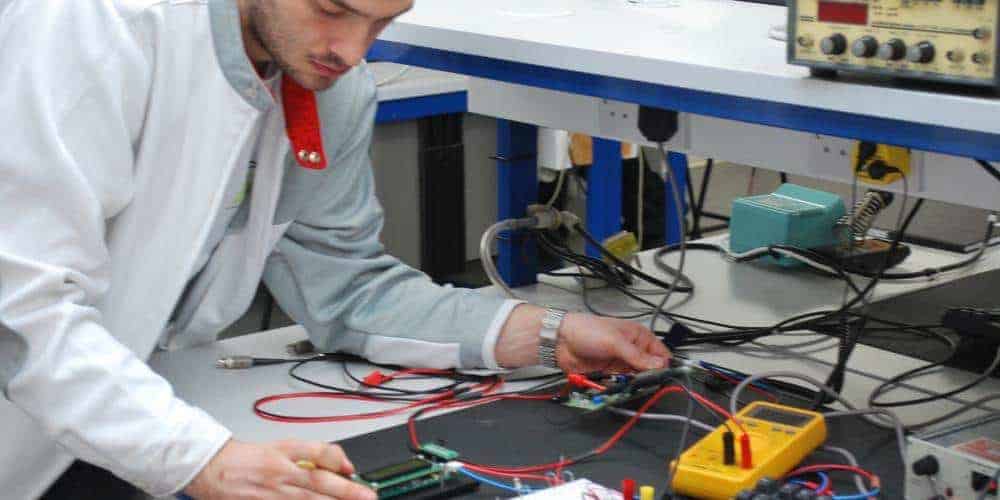
Testing
The final step in prototype circuit board assembly is testing. This involves verifying that the circuit functions as intended and that there are no defects or errors. Testing can be done using specialized equipment such as oscilloscopes, multimeters, and logic analyzers. It is important to ensure that the circuit meets all required specifications and that it is reliable and robust.
In summary, prototype circuit board assembly involves designing and laying out the board, sourcing the components, assembling the board, and testing the circuit. It is important to ensure that each step is done correctly and that the final product is of high quality.
Quality Control and Testing
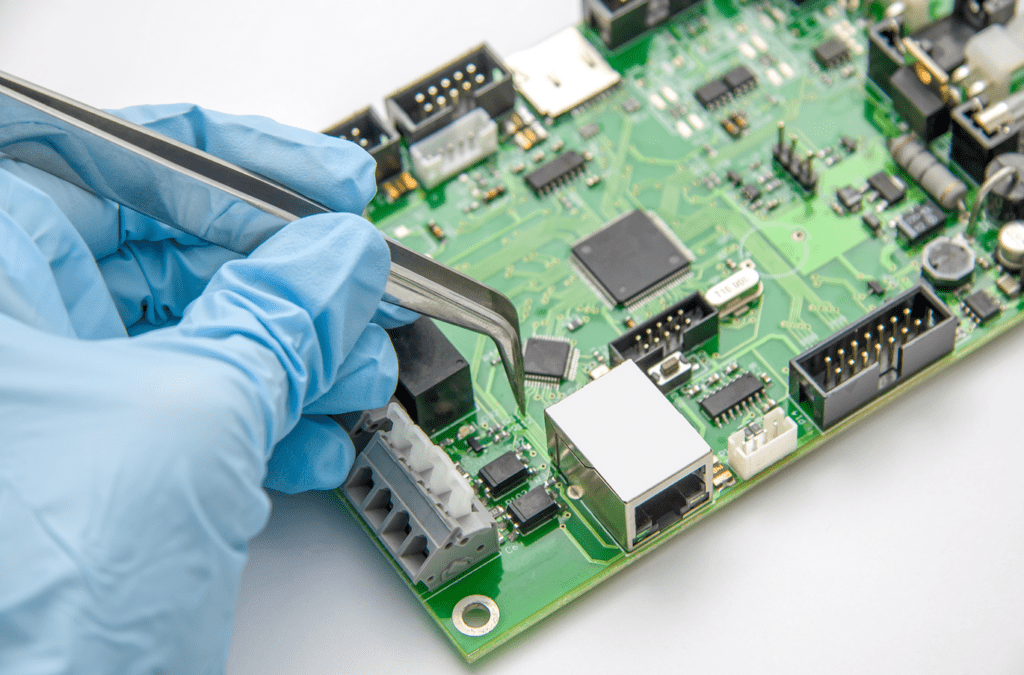
Visual Inspection
Visual inspection is an essential step in the quality control process for prototype circuit board assembly. During this stage, the assembly undergoes a thorough visual examination to ensure that it meets the required standards. The inspection process involves checking for any defects, such as solder bridging, misplaced components, or damaged parts. Inspection is carried out by trained technicians who use specialized equipment, including magnifying lenses, microscopes, and cameras.
Functional Testing
Functional testing is another crucial step in the quality control process. During this stage, the circuit board undergoes a series of tests to ensure that it functions correctly. The tests include checking the power supply, testing the functionality of each component, and verifying that the circuit board meets the required specifications. The testing process is carried out using specialized equipment, including oscilloscopes, signal generators, and logic analyzers.
Environmental Testing
Environmental testing is the final step in the quality control process. During this stage, the circuit board is subjected to various environmental conditions to ensure that it can withstand extreme temperatures, humidity, and other environmental factors. The testing process involves exposing the circuit board to different temperatures, humidity levels, and vibrations to test its durability and reliability. The environmental testing process is carried out using specialized equipment, including environmental chambers, thermal shock chambers, and vibration testing equipment.
In conclusion, quality control and testing are critical steps in prototype circuit board assembly. By undergoing visual inspection, functional testing, and environmental testing, the circuit board can be verified to meet the required standards and specifications. This ensures that the circuit board is reliable and performs as intended.
Common Mistakes to Avoid
Poor Component Selection
One of the most common mistakes in prototype circuit board assembly is selecting the wrong components. This can cause a range of problems, from poor performance to complete failure. When selecting components, it’s important to consider factors such as voltage, current, and temperature ratings, as well as the intended application of the circuit board.
To avoid this mistake, it’s crucial to carefully review the specifications of each component before selecting it. It’s also important to ensure that the components are compatible with one another and with the overall design of the circuit board.
Inadequate Testing
Another common mistake is inadequate testing of the circuit board. Testing is essential to ensure that the board functions as intended and to identify any issues that may arise during use. Without proper testing, it’s impossible to know whether the board will perform reliably in the field.
To avoid this mistake, it’s important to thoroughly test the circuit board before putting it into use. This includes both functional testing, to ensure that the board performs its intended function, and environmental testing, to ensure that the board can withstand the conditions it will be exposed to in the field.
Skipping Quality Control
Finally, skipping quality control is a common mistake that can lead to serious problems with the circuit board. Quality control is essential to ensure that the board meets the required specifications and standards, and to identify any defects or issues that may arise during production.
To avoid this mistake, it’s important to implement a rigorous quality control process that includes both visual inspection and functional testing of the circuit board. This process should be carried out at every stage of production, from component selection to final assembly.
