Lots of electronics designers created their project as a prototype making use of an Arduino circuit board. Furthermore, they are not sure if they should make use of the Arduino circuit board or an actual circuit board for the final production. Furthermore, have you wondered about the benefits and pitfalls of making use of an Arduino circuit board that is completely developed over the custom boards?
Also, it would be very helpful if you begin from the scratch for the design as well as the building of the actual circuit board using the Arduino software. The article will assist you in understanding the differences present between the regular circuit board and an Arduino circuit board.
What is an Arduino Circuit Board?
Before we discuss what an Arduino board is, let us first discuss what Arduino software is. It is known as an open-source hardware and software firm that permits users to design as well as construct different electronics projects. Furthermore, you can make use of an Arduino circuit board effortlessly in manufacturing digital and interactive devices with sensors and control systems.
The Arduino circuit boards provide users with a collection of digital and analog input output pins. Also, it helps in connecting different expansion boards and circuits. Furthermore, you can make use of the Arduino circuit board for the serial communication, as well as burning the code directly from the computer, as well as offering power.
Furthermore, an actual circuit board is made up of some printed conductive patters that are fitted onto the surface of the insulating material. There is a bare printed panel and is called the PCB (printed circuit board). In this case, there will be no electronic controllers or electronic components attached onto it, such as the Arduino circuit board.
Is the Arduino Board a Ready Made Circuit Board?
Arduino circuit boards are ready made. This means that it features all the necessary circuitry for its proper operation. Furthermore, at its heart is a microcontroller, a compact computer, and the heart.
If you want to make use of the Arduino UNO, then the microcontroller will become the Atmega328 chip. To ensure that it powers itself, the Arduino circuit boards feature an USB port that is useful for getting supply via the USB cable. Furthermore, you can make use of the AC to DC power adapter in delivering an external supply.
Contrary speaking, the actual circuit board is usually bare. Powering it depends solely on the user. You can buy the DIY kits of the Arduino circuit boards. Furthermore, if you don’t wish to purchase the already assembled Arduino, then you can go ahead and get the design tutorial of the Arduino hardware. Once through, you can manufacture it by hand. However, why should you waste so much time unless it is very necessary? Having a pre installed Arduino board on your actual circuit board, it becomes possible to have a final board that is simplified.
What is the Primary Use of the Arduino Board?
The main purpose for building Arduino circuit boards is for prototyping. The actual board on the other hand is the standard production board. One major reason for making use of Arduino in development has to do with the fact that you will not be able to manufacture a real board.
Furthermore, you don’t need to take out the connections of the Arduino board and then re-solder new wires. With respect to the component that you want to integrate, you can even get Arduino boards that already have everything.
Also, for the purpose of production, you only need some hours to create the actual circuit board. In addition, you have full control over all the components that have been used based on the specific number that you want to include.
In addition, it is possible to make use of extra debugging, expansion, or test pins. However, the Arduino board will not allow users to build their projects all by themselves. For the usual circuit board, you will have to work with a PCB manufacturer. This manufacturer will make use of the automatic machines in placing the parts and then pass them via the reflow machines to help in soldering.
Description of the Arduino Board
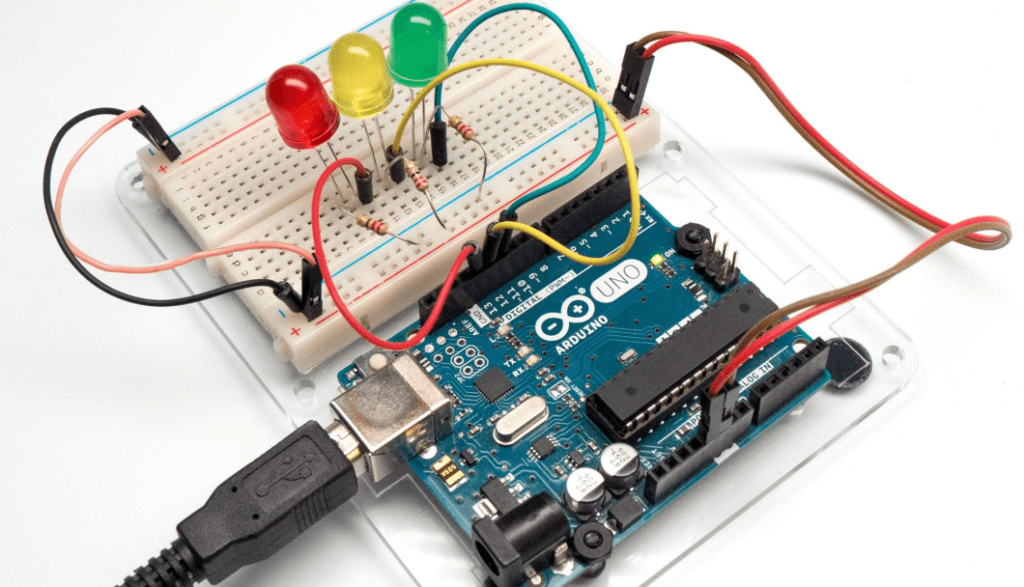
For this section, we will be learning about all the components that you can find on an Arduino board. Also, we’ll be studying the Arduino UNO board. This is because it is known as the most populous among all the circuit boards in the Arduino family.
Furthermore, it is a very reliable board to start with when dealing with coding and electronics. Though some boards may look somehow different and not have the components highlighted below, majority of Arduinos have most of these components in them.
Power USB connection
You can power the Arduino board by making use of your computer’s USB connection cable or USB cable. What you have to do is to connect your USB cable to your USB connection.
Power and Barrel Jack
You can power the Arduino boards directly from the power supply of the AC mains. This is possible when you connect it to your Barrel Jack.
Crystal Oscillator
A crystal oscillator assists Arduino to handle time issues. Now, how well does the Arduino calculate time? Now, the simple answer is its use of a crystal oscillator. Furthermore, the number that is printed on the top of your Arduino crystal i.e. 16.000H9H. This means that it has a frequency of 16 MHz or 16,000,000 Hertz
Voltage Regulator
The voltage regulator’s function is that it helps in controlling the voltage that is given to your Arduino board. It then stabilizes the DC voltages, which the processor as well as other elements uses.
Arduino Reset
It is possible to reset the Arduino board. Start the program; you can then reset your Arduino UNO board in two main ways. First is by making use of the reset button found on the board. Second, connect the external reset button onto the Arduino pin.
Analog Pins
There are analog input pins (analog inputs) present in the Arduino UNO board. The analog pins have the ability to read signals from the analog sensor such as temperature sensor or humidity sensor and then convert it to a specific digital value which you can use the microprocessor to read it.
Power LED indicator
The LED must light up whenever you plug the Arduino in a specific power source. This indicates that the circuit board is powered up the right way. If the light fails to turn on, something is wrong with your connection.
Main microcontroller
All Arduino boards come with a microcontroller. Just see it as the board’s brain. The major integrated circuit on Arduino is a bit different for each board. These Arduino microcontrollers are most times, from the ATMEL Company.
Also, before you load out a new program from your Arduino IDE, there’s a need to know the IC present in the board. You will find this information on top of your integrated circuit. To get more information regarding the IC functions and construction, check the data sheet.
Digital I/O
An Arduino UNO board features 14 digital Input/Output pins, whereby 6 offers an output called Pulse Width Modulation (PWM). You can configure these digital pins to function as the input digital pins in reading logic values such as (0 or 1) or like digital output pins in driving different modules such as relays, LEDs, etc.
AREF
This denotes Analog Reference. At times, this is useful in setting a specific external reference voltage (this falls between zero and five volts) which serves as the analog input pins upper limit.
What Electronic Components are Present in the Arduino Board?
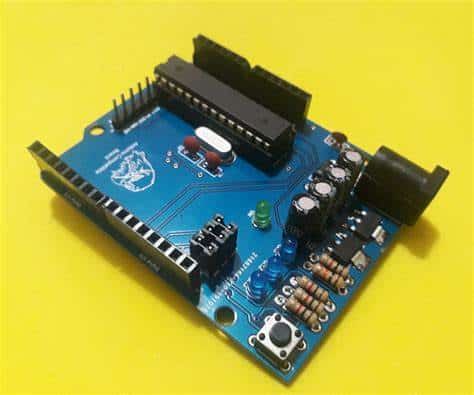
If there are other electronic parts present in the project, then there is a need to build the actual circuit board. The Arduino boards can’t take in additional parts alone. For this purpose, it is not right making use of connectors or wires in lining two Arduino boards. The best thing to do is first place your Arduino as well as other related components present on that actual circuit board.
In actual circuit boards, the copper traces help in connecting the electronic components. These copper traces are then etched in the printed circuit board. This process could involve copper as well as other metallic conductors. To place the Arduino board as well as other components on the printed circuit board, you must solder them to it.
However, the drawback of all these is you will not be able to make any changes quickly. This clearly explains the concept behind the language of Arduino board programming. Moreover, you can test the way this additional circuitry will function on the Arduino circuit board making use of the breadboard.
Immediately you are rest assured that you’ve created the right circuit, and then you can move on to other steps.
What Does Arduino Require for Full Production
To ensure full production, there may be a need to attach the Arduino as well as other electronics to the real circuit board. Moreover, the Arduino board still allows you to comprehend the electronic basics quickly.
This step is a practical one that will ensure you are a professional with the electronics skills. Also, you will learn very fast when you begin with an environment that is more challenging. Sure, it can be very challenging and frustrating when you start with an actual circuit board directly. As you are moving towards production, then you need to ask yourself a question. What special features will deliver a perfect design or destroy it?
Special attention should be paid to the Arduino board shields, if there’s any, need special housing, like location or position. Take for example, if the product needs some GPS antenna or Wi-Fi, ensure that the Arduino shields are positioned in order to have the best coverage for the system.
Anytime the project needs the LCD, ensure the convenient set up of the LCD to make sure that the end user will be able to access it easily.
How Reliable is the Arduino Board?
The Arduino boards are more dependable and durable for the manufacturing of simple as well as complex projects. This blue-colored board comes with the already soldered output and input ports. That these boards don’t need any soldering makes them strong and durable. Also, there is no need worrying about the wearing off of the solder as time goes on or the soldering expertise.
Don’t expect the plugged-in wires to hold up properly under the harsh environments. Furthermore, you are making use of the standard components, standard parameters, as well as the assembling method for the industry.
In order to improve the reliability further, you might make use of just one of the Arduino having a few wire connections. Also, you can avoid the double links which go over the Arduino boards haphazardly. Good connectors and quality parts also add to the reliability and durability of the Arduino.
Why the Arduino Board Require that you are a Professional in Programming
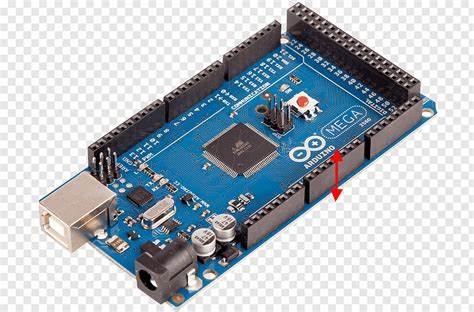
The Arduino board is available in different shapes and sizes. You can make use of the Arduino LilyPad for wearable applications. For demanding and complex projects, you can make use of the Arduino Mega
This is why they all come with different functions. However, there is one thing the Arduino Mega and others share in common. You must be a professional at programming before you can operate them. Due to this, this open source platform (Arduino platform) provides a computing Arduino IDE (integrated development environment). This includes the C and C++ programming languages.
Using the Arduino IDE software comes very easy. This is just like the notepad having open-source libraries and codes. This also comes with downloadable and integrated functions for deploying almost all codes. The benefit of this is that you are set even if you lack a good programming concept. Moreover, if you are seeking serious learning, you might fail on important ideas.
Conclusion
In summary, using the Arduino board for your Arduino project, you will be able to build a specific prototype. However, you will not be able to go beyond it. When you begin, they look perfect. However, we advise that you don’t adhere to any of them. With time, please work with a PCB or actual circuit board.
In addition, if you’ll be needing PCB manufacturing services, please reach out to us, we will be able to provide materials, technology, as well as high quality services. Contact us today so as to get some advice from our expert engineers.
