Technicians and engineers involved in a project’s design and development phase need to know what it will cost to take their product from an idea to a finished assembly. PCB manufacturing cost depends on many factors, such as design complexity and product performance. PCB assembly quotes will depend on the specific project you wish to build and its complexity. The price of your final product will also depend on the quality of your design and the component quality. PCB assembly labor can be cost-effective and low-priced if you use low-skilled labor and low overhead costs.
If you choose to use high skilled labor, then your labor costs will increase. The size and number of layers in your design will also affect how much it costs to produce. Average price of PCB assembly is $0.02 – $0.05 per square inch, depending on the design complexity and labor involved in the process. Keep in mind that this number may vary depending on many factors such as labor rates and overhead expenses. The time required to produce a PCB depends on the complexity and size of your project. The cost of manufacturing can be higher or lower than this average price due to labor rate costs and overhead expenses.
PCB Assembly Cost: Why It Matters
Going for a cheap PCB assembly phase may be tempting if you are working with a tight budget or tight timeline for your next project. But it’s essential to be conscious that PCB assembly costs can differ wildly between companies. Your PCBs’ quality will have a significant impact on the way your product performs, both now and down the line. Also, anytime you are talking about PCB assembly cost, you’re talking about your PCBs’ reliability, longevity, performance, and functionality for years to come.
If the last time you ordered anything was over six months ago, it’s time to talk with your supplier about pricing for new orders. You may think you know your costs, but if your costs are different from everyone else’s, that’s a sign of variability, and it doesn’t bode well for reliability and performance. It is not to say that some companies will charge more while others will charge less. It only means the cost of PCB assembly can vary hugely between companies.
For example, a PCB assembly company may charge $15 per square inch (actually, they may add material but let’s not go there), while another company charges $0.83 per square inch. If you use a generic PCB design, it may be easier to make your PCBs in-house. Still, if you are using one of the top designers in the industry, chances are they will have all their papers in order, saving you money over trying to do it yourself.
The Primary Factors Determining PCB Cost
Lead time:
Lead time describes ordering and shipping times for your product. There is an inverse relationship between lead time and pricing, with extended lead times resulting in lower pricing.
Quality:
Quality refers to how good your design is, i.e., how well a design performs. Factors such as complexity, reliability, and yield determine the quality of your PCB. Complexity is often measured in terms of area for a given via count and has several components, including PCB tracks, soldering points, and so forth. To evaluate whether your PCB design is complex or not, you will need to determine what the average number is in a specified product type and assembly method your company will use.
Functionality:
Some design errors are easy to spot, while others can be difficult to find. Therefore, the more functionality tests you perform on your PCB design, the better quality control you will have. It will lead to higher tolerance levels and ultimately reduce rework and production delays. By improving efficiency in PCB manufacturing and assembly, the number of order cycles (designs built into the final product) will decrease significantly. This improves profitability for your company.
Quantity:
There is a fixed cost per square inch for each quantity order (except for bulk orders). Therefore, the more units you order, the lower the cost per unit.
Once you know your costs, you can develop a budget for your project and determine how much profit margin you need to build into your PCB assembly quote. Once you do that, it will be easy to set your prices for each product produced by your company.
Why is PCB Assembly so Expensive?
PCB assembly is expensive because the basic materials themselves are expensive. This is not to say that no companies manufacture cheaper PCB assemblies; its purpose is to say that quality remains unaffected, regardless of its costs. It is not unheard of for companies to offer or exceed the price listed in the example above if they feel that you, as a valued customer, will be more willing to spend the extra money to receive better quality in your final product.
PCB Assembly Costs by Product Type
Manufacturers design, manufacture, and assemble PCBs to meet the needs of different industries. Therefore, factors directly related to the industry, product type, and assembly option affect the cost of PCB assembly. The following list gives a rough estimate of where you can expect to find your typical cost for each product type.
Assembly Process Manufacturing Costs
- Stamp/Shrink +$1.00 per unit +/- 1%
- Solder +$1.00 per unit +/- 3%
- Spot +$0.05 per point +/- 2%
- SMT/LGA +$1.00 per unit +/- 1%
PCB Assembly Costs by Assembly Option
The Assembly process affects the cost of your PCB assembly in two ways:
- Materials themselves are more expensive
- Each assembly process requires a certain amount of retesting because of inconsistencies in the manufacturing process.
The following list shows each method used to assemble your PCB design and how much it costs you.
- Turnkey No Processing No Manufacturing No Assembling $0.52 per square inch +/- 2%
- General Process Assembling -$1.00 to -$1.20 per square inch
- Turnkey Processing +$0.72 per square inch +/- 1-2%
- General Process Manufacturing -$0.20 to -$0.52 per square inch
- Turnkey Manufacturing +$1.00 per square inch +/- 1-2%
- General Process Manufacturing -$0.20 to -$0.72 per square inch
- Turnkey Assembly +$1.00 per square inch
PCB Assembly Costs by Assembly Method
This is one of the most significant factors affecting your cost; the type of assembly you choose for your PCB design affects the quality and complexity of assembly and therefore costs. For this reason, if you are looking for the cheapest PCB assembly, it is wise to employ an experienced PCB assembly company that can give you a thorough assessment of your design.
Things to consider when estimating the cost of assembly
Cost is one of the most significant factors in choosing an assembly company. You should consider the following factor if you want to make PCB assembly cheap for you:
1. A PCB Manufacturer’s Reputation
If the manufacturer’s reputations are reasonable, their processes and machines are also likely to be reliable and effective. If you run into problems, they will usually treat these with care and send out replacement PCBs quickly. Some suppliers will happily amend any errors by sending out a second batch of PCBs to you at no extra charge. Choosing a printed circuit board manufacturing company with a global reputation such as RayMing PCB and Assembly ensures that you get expert services to your satisfaction. You should consider the service provided by the company, whether they are available when you need them, how long it takes them to be at your premises, and their overall level of expertise.
2. The Time It Takes To Manufacture Your Product.
There are various steps involved in the manufacturing of any printed circuit board product. The list below indicates how long it will take you to have your PCBs made, depending on the complexity of your design and the quality of the PCB materials.
Step Description:
- The PCB manufacturer reviews your board design to ensure that the layout is correct. An experienced board manufacturer can generally complete this step within two days, but this process may take much longer if it is a complex design.
- A PCB manufacturer checks the components you have supplied against the list of components you have provided with your PCB design. This process can vary depending on which components you use, but it usually takes about one day to check over 500 parts.
- You apply machining to the PCB using a sophisticated machine. This involves cutting, drilling, and punching. It can take an hour or more to complete this process, depending on the individual components and the complexity of your design.
- They then outsource the board to a print shop based in Europe or Asia who will apply a solder mask and solder paste to each of the terminals on the PCB. This takes up to 3 days, depending on the number of tracks per side and how many PCBs the manufacturer produces.
- Then they package the boards using robust anti-static packaging materials. This process usually takes less than 24 hours, depending on how many PCBs you make or need.
3. PCB Assembly Methods
There are numerous methods of assembling printed circuit boards (PCBs). Printing circuits manufacture a PCB onto a copper-clad with conductive ink. They then place a PCB on a machine with multiple heads that squirt hot solder paste or conductive ink onto the board. They apply Flux to the top of the pad or component that helps the solder adhere to the PCB. Then they place components on each pad, and then solder it well. You can do this process by hand, but a robotic machine usually performs it with multiple heads that replace components and re-flow a solder joint if a defect occurs.
The most common methods used for PCB assembly are:
· Automatic insertion machines (AIM):
These machines place components automatically using robotic arms or assembly lines. Assembly machines use a machine vision system to place components. More complex machines can employ a robotic arm with a calculator-like device that gives information on the component’s position. Most of these machines have four arms, two for each side, making assembly faster and more automated. Semi-automatic insertion machines (SAIM). These are very similar to automatic insertion machines (AIM). The difference is that they do not use robotic arms but rather simple tip applicators attached to single arms.
· Solder-bumping machines:
These are similar to automatic insertion machines. Still, instead of using robotic arms, they have robotic arms that use heated pads to apply solder paste or conductive ink. The bumped spot has a large opening that allows components to fit into the pad.
· Leadless PCB construction:
This means your PCBs have no solder mask on them because it is unnecessary in this assembly style. The advantage of this style of board is that you can place many components into one hole, leading to a very efficient system. To accomplish this, a machine must apply solder paste to each component and place the parts onto the printed circuit board. This kind of machine is also known as a re-flow machine.
· In-house assembly:
Given that most manufacturers have their in-house facilities, they can produce their PCB assemblies. This is an efficient assembly method because it enables them to produce their product without paying any extra fees for the services of a PCB manufacturer.
4. Board Size & Number of Layers
The number of layers on a PCB is vital for the board’s thickness and the amount of current that can flow through it. A top-layer copper-clad allows for the production of a board from 0.020” thick materials. In contrast, thicker materials above the copper will reduce the effective thickness of a PCB by allowing more heat to escape from the board’s surface. The number of layers determines the maximum thickness that can make a PCB. A multi-layer PCB’s complexity and cost will affect how long it takes to manufacture. The manufacture of a two-layer PCB can take a little over a day, while a four-layer PCB may take up to five days or longer depending on the kind of materials and the number of layer changes.
The thickness of the top-copper layer depends on how many layers are present in your design. If the number of layers is greater, the thicker the layer of copper and the higher quality board you can produce. The thicker the layer of copper, the better your soldering joints will be and your heat dissipation and electrical conductivity. A thinner layer will make it easier to solder components to your PCB. However, it is less conductive and may not dissipate heat as well as a thicker board.
The number of layers on a PCB determines what percentage of the total cost it will be.
5. Board & Component Material
The choice of materials may depend on the processing methods, application, or system you will use it in, or both.
PCB thickness is also dependent on the materials used, and one chooses typically thin materials for more demanding applications where higher reliability is essential for longer life. You can select thicker materials for higher current applications where heat dissipation is of primary importance.
Thicker boards have a lower cost per mm2, but they will have increased design complexity and require longer manufacturing lead times. Thicker boards are essential for applications where heat dissipation is necessary.
The type of materials used in your board can impact how conductive it is, as well as its ability to dissipate heat during the soldering process. The copper thickness used in your board can affect its electrical conductivity.
Standard FR4 or similar materials are suitable for all general applications. Today’s high-speed digital systems demand higher signal speeds and require better conductor paths between components.
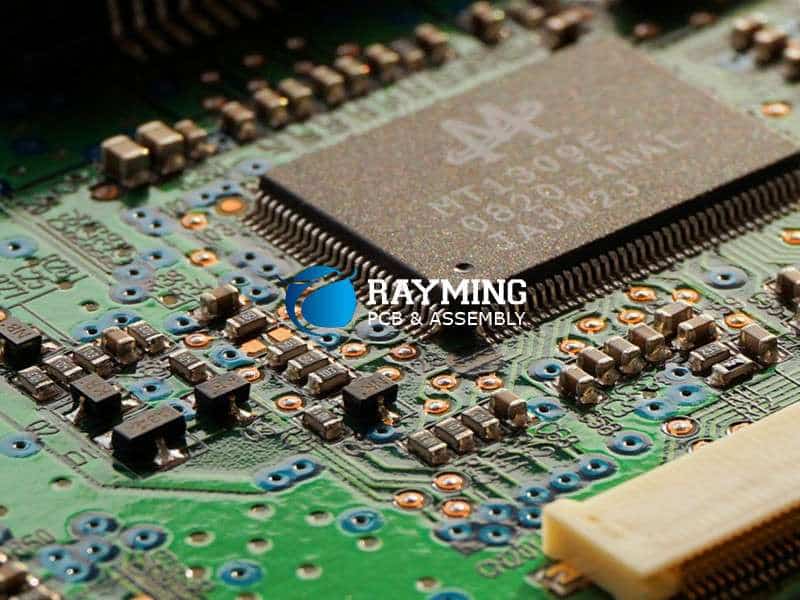
6. Technology Used (SMT vs. Through-Hole)
Through-hole boards are generally cheaper and easier to assemble; however, they are larger when compared to surface mount boards. It is also more challenging to integrate smaller components with surface mount technology unless placed on the top or bottom of the board.
You can place through-hole components anywhere on a board by hand. Through-hole boards require skill, and one must design correctly to ensure all the leads align with each component correctly.
SMT components are faster to assemble due to their size but are more expensive. They are also harder for beginners since one must master soldering techniques before producing boards that work correctly. You can set SMT components anywhere on a board by a machine, and they do not require the same level of manual assembly
The number of holes you need in your design depends on how many components you wish to place into your design. SMT boards tend to have more components than through-hole boards; therefore, they can get smaller than through-hole PCBs.
7. Design Complexity
The design complexity of your board will affect the time it takes to design, prototype, and test your product. A board with a limited number of layers can be designed in a day, while a complex multi-layer board may take up to five days or more depending on the number of layers and how many changes you need to make before the first production run.
Design complexity is mainly dependent on the number of layers present in your project. The more layers, the greater the production time it will take to produce your design.
8. Labor Costs
Low-cost PCB assembly will depend on the number and type of labor and skill you choose or the company you outsource to has.
A beginner with little to no experience can easily produce a basic PCB assembly that can undergo testing and production on a mass scale.
Fast turnaround times and easy assembly will result in board production costs as low as $1.00 per square inch using low-skilled labor at a minimum wage rate. These costs will further reduce as you increase the quality of your design and increase your volume. The region or location of your PCB assembly will impact how many labor hours required to produce the final product.
You can typically find low-skilled labor costs in low wages, strong labor unions, and regulations are not too strict. Low-skill labor is not widely available outside of this region or location, which means that high volume manufacturing has restrictions in developed countries with high-skilled workers. Low volume production needs should exist in countries with developed legal regulations and strong trade unions, where wages are low.
The same challenges exist within high skill labor markets. High-skill labor is more expensive than low-skill labor, but it is also more skilled and takes more time to train. High-capacity PCB assembly only has free practice to developed countries with relatively strong legal regulations and strong trade unions.
9. Component Quality
The quality of your components can drastically affect how it performs and how long it lasts. This is particularly true when it comes to ICs or integrated circuits used in your product.
Component quality also depends on the design complexity and process used to produce your product. Complex processes require better quality components due to increased yields and better assembly results, and high-quality components are essential for creating reliable products. Component quality depends on the design complexity of your project. Manufacture of simple designs can happen at very low production volumes to provide high-volume/low-cost product experiences. In contrast, complex designs will require more labor time and increased yields to bring down production costs.
The time required when sourcing components from raw material suppliers will also impact the quality of your product. Choose to use a component manufacturer that can provide you with fast lead times, low power consumption, and low-cost components.
10. Packaging of Parts
Packaging your components in the right way will help protect the longevity of the product itself. The types of packaging you use will also affect the strength of protection to your product. You can design and use your packaging for storing or shipping purposes only, so you should research the best materials for your specific needs.
Material types that are durable and long-lasting are useful in cases that require protection or storage during shipment.
The best packaging does not necessarily have to be the most expensive, but it should be durable enough for your project.
Conclusion
So, if you want to understand the cost of PCB assembly, the next thing you need to do is first choose the desired product. Then the next step will be to decide on the design complexity and the type of product you can produce. The complex designs require more time and effort, so if you want to keep costs low, try for simpler designs that use simple production methods.
