If you’re having trouble deciding between the best design for a flex PCB and a rigid one, you can do a few things to do the latter work for you. Flexible boards are lightweight, durable, and suited to demanding applications, which is why they require tighter outline and layout tolerances than rigid PCBs. However, if you’re unsure how to proceed, here are ten tips to help you make an excellent flex PCB design even better.
Flexible printed circuit boards are lighter, durable, easy to install, and suitable for demanding applications
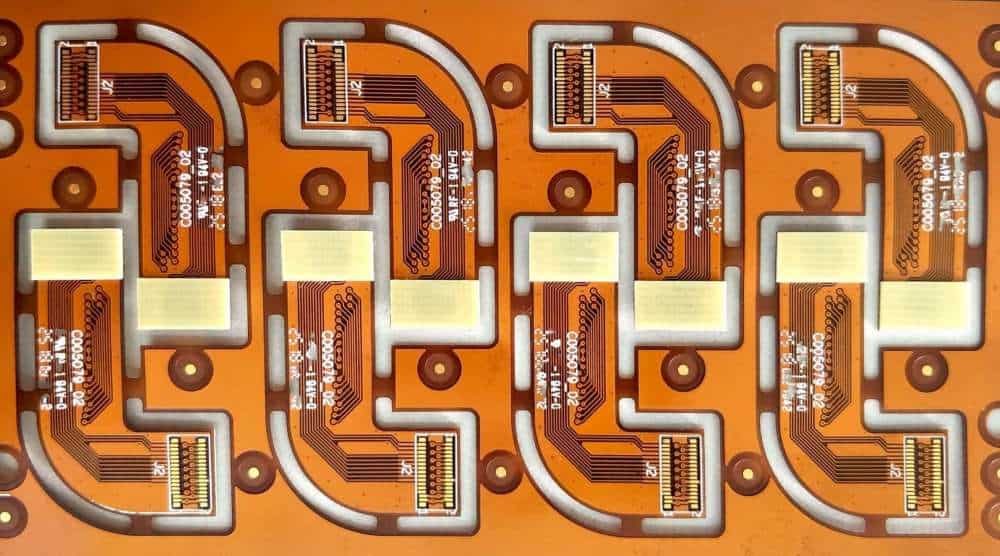
Flex printed circuit boards contain two materials: a polyimide dielectric layer and copper traces. Both materials are highly resistant to traction and temperature. Copper is the electrical conductor as it represents circuit traces and helps signal transmission. The dielectric layer has a protective coverlay or coat. The adhesive material is composed of epoxy resin or polyethylene.
Depending on the application, flexible PCBs may be curved or curl depending on their insulation medium—a polyimide film commonly used for flexible circuits, which resists high temperatures without melting. The polyimide film is elastic after thermal polymerization. Unlike rigid circuit boards, PI is not a conductive material. Hence, we often use adhesive-free flex PCBs.
They offer improved resistance to vibrations and movement
Flex boards offer improved resistance to movement and vibrations. Because the flexibility of flex material makes them less susceptible to wear, the bending radius is usually as low as 10%. Because the flex material will not undergo continuous bending, it’s easy to produce multiple flex circuits on one board. The bend line affects the routing of the board, which can lead to mechanical stress. Through hole plaiting and additional coverlay can reduce mechanical stress and support the pads.
A cover lay protects the flex circuit. The preferred material is a polyimide film enhanced with adhesive. Screen printing can imprint the coverlay. The cover lay is laminated to the board using specific limits of pressure and heat. When the flex circuit is laminated, we remove the coverlay to reveal the solder paste in the desired locations. A rigid-flex PCB may be a good option for applications where vibration is of great concern.
They require a tighter outline tolerance than other PCBs
The engineer must consider how the traces are connected and positioned when designing a flex circuit. For example, some circuits require through holes, but you can omit them. A double-sided flex PCB is popular among engineers and designers because it allows them to design interconnections easily. It also allows for a tighter outline tolerance compared to other PCB types.
When designing a circuit, conductors can have various impedance values. This is beneficial when determining the slope of a circuit. Via holes can be as small as 25 um. Filleting multiple traces also ensures that the stress is evenly distributed. The alternative is to use plated through holes for very small pads.
They require a tighter layout tolerance
If you’ve ever designed a PCB, you’ll know that a tighter layout tolerance is essential to get the most out of the flexibility of a Flex Board. However, this is not as straightforward as it sounds. You can’t expect your PCB vendor to guarantee the exact thickness of your circuit board. That’s because the dielectric layer breathes and expands as it cools and warms. As a result, the thickness tolerance that your PCB vendor is willing to accept is much higher than what your design team demands.
To be effective with Flex Boards, you must remember that their circuitry has a much tighter layout tolerance than standard PCBs. Because of this, the common conductor width should be at least 375 um. In addition, the through hole diameter should be 200-250 um larger than that of the component design. This is due to the practice of automatic placement, which requires a larger hole diameter.
Flex Board Design – Expectations Vs. Reality
In UI/UX design, expectations vs. reality are essential to achieve a great user experience.
Expectations vs. Reality in UI/UX design
One way to quickly onboard users is to connect UI elements to universal actions. However, a designer cannot always control the influences of users. A calculator, for instance, is unlikely to accept input from a user who cannot speak English. So, it’s essential to balance expectations and realities to create an engaging product. In addition to balancing expectations and realities, UX designers must be flexible to adapt to changes in the user base.
Examples of UI/UX designs that fail to meet expectations
When a website’s UI/UX design fails to meet users’ expectations, the culprit is not the underlying technology but the content itself. For example, users are hardly likely to read pages of text if the content is unreadable or confusing. Therefore, we should design the user interface so that the most relevant information is readily available to the user at any time. Conversely, too much content, such as an overflowing information bar or a long, boring explanation, will turn users away.
In addition to the design itself, bad UX also applies to physical objects. Users must be able to easily complete a task without causing them to encountering numerous errors and frustration. Bad UX design is detrimental to the product or service in such cases. It can be a result of the priorities of the designer, assumptions of the audience, or the product or service’s functionality. The result is bad UX for both the user and the brand.
Consistency is key. Users will quickly recognize a site or product that uses common icons. Consistency of visual language and consistency of icons is essential for a successful UI/UX design. The design should not alienate users but should cater to specific groups of people. It is not possible to satisfy everyone with a mediocre UI/UX. Users will quickly move on to the next if the UI/UX doesn’t meet expectations.
Alternatives to UI/UX designs
While you’re thinking of designing for the Flex Board, it’s worth exploring some of the alternative UI/UX designs available. One popular alternative is called Sketch. It’s a visual design tool that works best with web-based applications. Its intuitive interface makes it a popular choice among UI designers. Fortunately, Sketch also has various UI components that improve its overall usability.
Problems When Working With Flex Board Design You Can’t Ignore

If you are working with a flex board, you might be facing the same issues that you do with rigid ones. First, the solder joints are not always as rigid as the copper trace. This can cause problems with the ink transfer between the anilox and the substrate. Furthermore, solder joints placed too close to the bend point can result in the solder pad cracking or even loss of lamination. To avoid these issues, you should ensure that the PCBs are well-tested before starting the manufacturing process.
*Solder joints too close to the bending point
During a one-time bending process, the solder pad on a Flex board can crack or delamination. Ideally, solder joints are sufficiently distanced from flex bend points to avoid this issue. However, this may not be easy if the Flex board cannot accommodate the flex bend point. In these situations, a jig or clamp is ideal for supporting the Flex board while bending.
Another problem manufacturers face when working with Flex board design is that solder joints should have sufficient spacing. This is because the flexibility of a Flex board prevents the solder joints from being as rigid as those on rigid boards. The flexibility of a Flex board necessitates that the solder mask/coverlay openings be more expansive than those on rigid circuit boards.
Poor ink transfer between anilox, image carrier, and substrate
One common reason for poor ink transfer is the flexographic plate or anilox condition. This condition causes uneven print density and shading, the visual consistency of an orange peel, and poor ink transfer. To prevent this condition, choosing the appropriate anilox with the correct cell count and volume is essential. It is also necessary to clean the ink-transferring elements of the anilox.
The flexographic printing process is like gravure printing but uses a curved printing plate as an image carrier. It uses an etched or engraved roller to transfer the ink to the printing plate. The anilox roller receives the ink from the ink bath and transfers it to the printing plate.
Uneven print density
If you’re experiencing uneven print density when working with Flex board designs, you may want to check the design’s layout and the process. The third and fourth passes of the printing process produce dots on the print pixels. These dots belong to the third and fourth-pixel groups, respectively. When these dots appear, the board design will have an open circuit. In this case, you should regularly clean the stencil’s bottom to avoid the tombstone effect.
Costs of rigid-flex PCB design
The costs associated with a rigid-flex PCB design are typically more expensive than a standard PCB, and you may be surprised to learn that they’re less than what you’d expect. Flex PCB designs require different die and punch requirements, increasing labor and material expenses. You should first consider the size and function of your rigid-flex PCB. If you’re looking to design a smaller board, the fewer layers you need and the faster it can be produced, the better.
The benefits of a rigid-flex PCB design are many. First, you can make it out of polyimide, which is thermally stable and is popular in military and defense applications. The advantage of using a rigid-flex PCB design is that it requires fewer materials and reduces the risk of circuit failure. Furthermore, it’s cheaper to make, so you’ll save on manufacturing costs. Rigid-flex PCBs also require fewer components, so you’ll spend less money on them.
The Next Big Thing in Flex Board Design
When you compare a flexible PCB to a traditional printed circuit board, it’s obvious why they are the superior option. Not only are they more durable, but they also resist shock and vibration. And because they are multilayer, they are also easy to install.
Flexible PCBs resist shock and vibration
A common question is whether flexible PCBs can withstand shock and vibration. The answer is ‘yes’ – they can. Flex PCBs are sometimes flexible, while rigid ones can withstand high temperatures. Flexible PCBs consist of two materials – a flexible polymer core and a rigid substrate made of fiberglass or metal. These PCBs are more flexible and durable, with the former resisting excessive vibrations and shock.
Flexible circuit boards, also known as flex circuits, are increasingly used in electronics manufacturing. These circuit boards can bend into smaller electronics without causing damage. They’re also ideal for modern devices, such as smartphones and help absorb shock in high-stress environments. Rigid-flex circuit boards combine rigidity with flexibility to provide a more rigid-than-flex PCB alternative in specific applications. Rigid-flex PCBs are also an excellent choice for applications where durability is of the utmost importance, such as in vehicles.
They are durable
The flexibility of Flex Boards allows designers to extend the potential applications of PCB design. These flexible boards are especially useful for smaller circuits. Depending on their application, Flex Boards can consist in several different ways. These include heat-forming, routing, and bending.
The primary material used in flex PCBs is polyimide. The advantage of this material is that it is more durable and uniform than rigid PCBs. It has a Dk value between 3.2 and 3.4. The flex material does not require woven glass reinforcement, reducing variation in Dk. Because it is extremely uniform in thickness, the manufacturing process is relatively easy. The typical layer thickness is 0.5-to-4-mils.
They are flexible
The next big thing in the flex board design industry is flexible PCBs. Flexible circuits are not often in bulky products but offer various space-saving solutions. For example, flex PCBs can be thinner than a standard board, allowing manufacturers to create smaller products without sacrificing functionality. Ten years ago, building flexible circuits was a labor-intensive and time-consuming process. However, the reliability of flex circuits has increased dramatically.
Flex PCBs can have ten or more layers, unlike rigid PCBs. The thickness and the number of layers will influence the overall cost. The flex lay-up of a PCB also impacts the cost and performance. For example, you must carefully choose the copper weights according to impedance resistance and load-carrying requirements. Also, flex PCBs are more difficult to assemble and unsuitable for applications requiring very precise alignment.
They are multilayer
Compared to standard PCBs, multilayer flex boards have multiple layers. These layers include insulating layers made of polyimide and a B-staged adhesive. The insulating layers can protect the delicate copper traces on the board and prevent solder from wicking up along the circuit traces. Additionally, multilayer flex boards allow for design flexibility as we use different thicknesses of polyimide and adhesive.
These flexible circuits are a better solution for many manufacturers because they are easy to assemble. This PCB design eliminates the need for cables and connectors and allows for more customization. Unlike rigid PCBs, flex PCBs allow for three-dimensional builds and eliminate the need for cables. The result is a smaller and less expensive product. Multilayer flex PCBs can also be more energy-efficient and require less space than rigid PCBs.
They are easy to manufacture
Manufacturers develop Flex Boards using a vacuum hydraulic press. They have a special protective coating that helps prevent solder wicking along the copper traces. Then they process these panels like a normal double-sided board. As a result, they are easy to manufacture, inexpensive, and fast to complete. Read on to learn more about the manufacturing process and the benefits of flex boards. Also, find out why flex boards are more cost-effective than rigid boards.
First, they make a flex board by cutting out the circuit pattern. This process is called “blanking.” It requires expensive tooling but allows to simultaneously punch out of many flex circuits.
