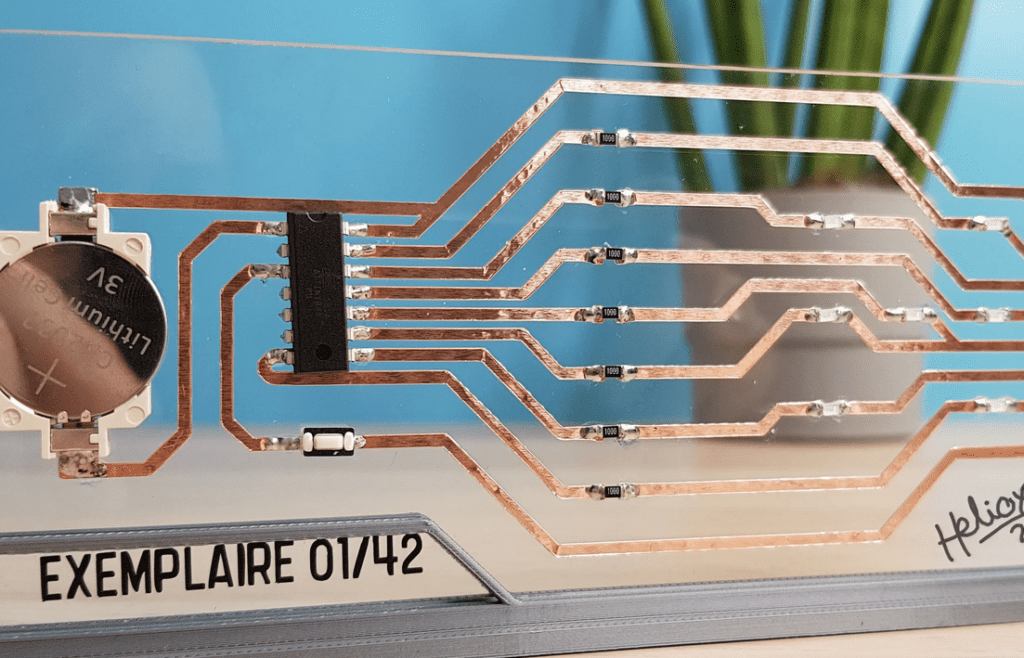
Circuit boards surround our daily lives, from the ultra clear float glass to the transparent glass PCB you use; you have these glass-printed circuit boards around you. Electronic glass-printed circuit boards can be found in high-tech products, computer tools, and household appliances. There are many PCBs, from glass substrate to transparent glass PCB, and different manufacturing methods.
The traditional way to print a circuit is to create a copper overlay on the glass PCB or glass substrate and etch the unwanted copper on the printed circuit boards. If you are new to glass PCBs, this comprehensive guide provides you with all the details you need to know about glass PCBs, copper foil, and printed circuit boards.
What Is a Glass PCB?
Glass circuit boards are usually made of a non-conductive base material with a copper circuit layer hidden outside or inside. They consist of up to a hundred copper layers for high density and work against UV light. Every copper board of glass PCBs has UV resist films, and these UV resist films have a regulated glass transition temperature.
PCBs come in various shapes and sizes and are manufactured in various ways, among other things. Using an etching solution to remove unnecessary copper from the copper board involves designing a copper circuit on the copper board and reviewing an existing one during the PCB assembly process.
What Is a Glass Substrate?
While many may be conversant with a PCB substrate and how it works, not much is known about the glass substrate, especially since fiberglass PCB. Glass substrates serve as the basis for various optical devices.
For mirrors and lenses, glass blanks are grounded, encrusted, and refined to fit the standard use for a PCB substrate. The base glass is thermally stable and highly uniform when the transmission, ranging from micrometers thick to meters in diameter, depending on the epoxy resin used.
Glass PCB Etching
Glass PCB is commonly used for LCB and LED during the PCB assembly process. We can make it from raw glass materials assembled on a layer pallet or a conventional glass surface. In the glass circuit board, the circuit must be transferred to the copper board using a UV-curable mask attached to the copper board.
UV-curable masks offer perfect outcomes even with more narrow track widths and ensure only the tracks mapped out are used during the PCB assembly process. Copper traces are made on the copper board and tagged copper pathways to ensure heat resistance.
This technique is used even in the mass production of float glass or ceramic PCBs with pre-stressed glass and an auto-route tool. UV-resistant etch-resistant thin coatings cure when exposed to UV light. This resistor is applied to a copper plate and is exposed to a UV light source through an opaque film containing an image of the circuit. The circuit design is annealed on the resist film in this way.
Uncured films can be removed with the developer and ready-to-etch patterns, avoiding tear resistance for flexible circuits on the copper board. Be aware of the term developer; it’s just a weak base solution, like baking soda can remove raw UV resistance.
UV-resistant films are divided into two types: positive and negative. When the developer is applied, the exposed portion of the photoresist remains insoluble, while the rest is soluble. The opposite of negative is positive. I’m going to use the negative in this naughty one.
Materials Used In PCB Glass
When understanding what PCB glass is about, you need to pay attention to the materials used. Unfortunately, not so many people are attentive to this, and it makes them settle for a transparent sheet of less quality keeping all the unexposed parts of the glass PCB vulnerable during the exposing process
The materials needed to make a glass circuit board or that should be found on component diagrams for electronic circuits:
- A piece of glass, if necessary
- Photoresistance to UV
- Baking powder
- Copper foil
- Iron chloride
- Printing from OHP
- Glue
Steps to Produce a Glass PCB
Now that you know what a glass PCB is about, you must understand that you must follow certain steps to achieve the desired result. You may have all the materials needed to work on a glass PCB and still not get it right because you did not follow the right steps. The appropriate steps to achieve an impressive glass-printed circuit board include the following:
1. Circuit Layout
Once we have the hardware, we need to transfer our circuit board layout to a white sheet. This can be achieved by printing the design on OHP paper. First, make a block diagram of the circuit. Then make the PCB layout and have cured resist tracks in place. Then draw the circuit path using the autoroute tool and the scotch tape. It may seem complex for a beginner, but everything will be fine after a few lessons on using the desired copper materials and leaving out the undesired ones.
2. Print Layout
OHP printing aims to create a mask that prevents the resin from being exposed to UV rays in unwanted areas. For maximum results, the light must be shielded by the darker side of the OHP to prevent light from passing through. However, the paint layer only partially blocks the light. As a result, the three prints were lined up and glued together for stability.
3. Glue the Glass to the Copper Sheet
If you use copper plated on glass, you will need to glue the copper. A thick copper foil is needed to facilitate the process, and the thickness should be about 0.05 mm is ideal.
4. Using Photoresist
First, cut a piece to the size you need. The photoresist has two transparent caps that cover both sides. Photoresist materials are rough. Once the cover is removed, it is the base that needs to be mounted on the copper plate. As mentioned above, resist film has two envelopes. To repair the photoresist, you must first remove the cover. To do this, we can use two pieces of tape on the top and bottom of the resist film. The cover can be removed by removing a piece of tape.
5. Change the Light Exposure Settings
After applying the photoresist, it is now time to make the settings. Spread out the OHP prints we have made before. Place it on the copper plate. Make sure the printout is on the right side up. Otherwise, the entire print may be reflected. Then place a glass piece to ensure the OHP print sticks to the copper plate. After successfully doing this, you will need to expose the outcome to sunlight and observe it carefully.
6. Exposure to Light
Now, it is necessary to expose the preparation to sun rays. You can use an artificial source if access to sunlight is not possible at that point. This source can be gotten from sunlight, enough to stay in the sun for 5 minutes. Maintains the stability of the global configuration during the exposure process. This is where clips come in handy.
7. Create Resistance
Make a solution with baking soda. Any simple solution will do. If you can’t find baking soda, you can use washing powder. Anyway, once you’ve prepared the developer (baking soda/washing powder solution), soak the board and set it aside for a minute. Remove the cover again using the tape. Then remove and wash carefully. You should see the unexposed part being washed away. Repeat the procedure until all exposed parts are rinsed.
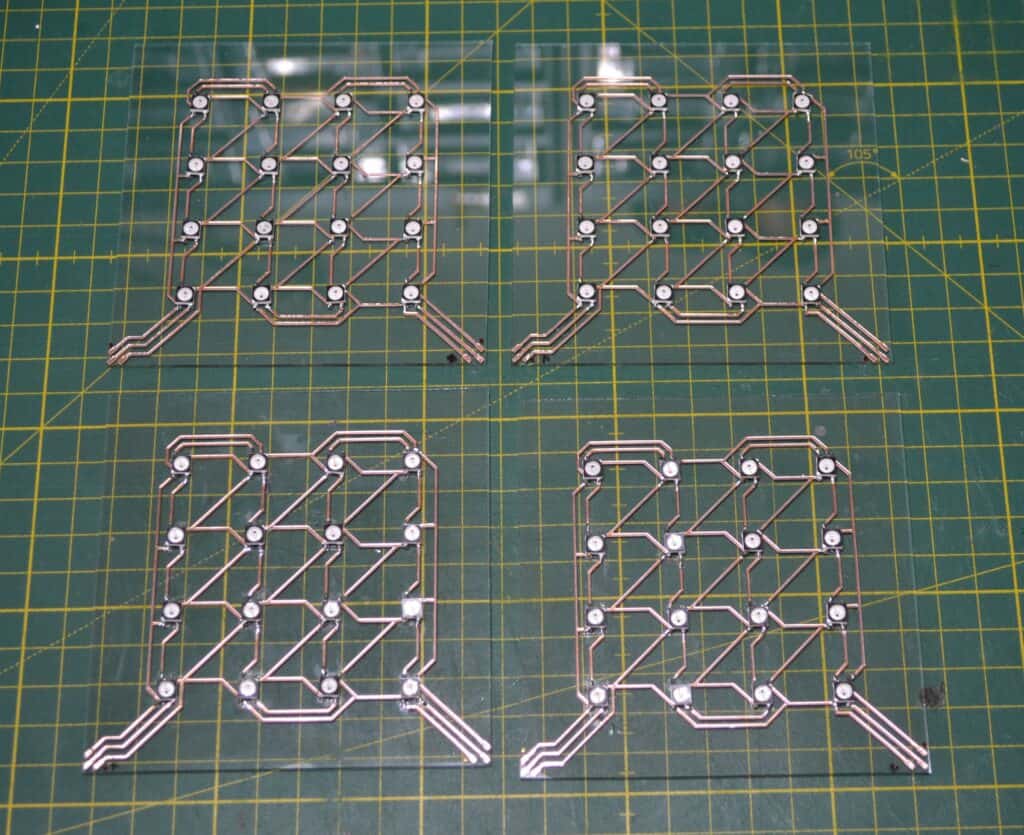
8. Engraving
Take ferric chloride powder and dissolve it in about 150 ml of water. The solution should be black. Add additional ferric chloride if necessary. After preparing the solution, dip the copper plate in it. Shake the board frequently to ensure effective etching. After about 10-15 minutes, all unwanted copper should be removed from the remaining path.
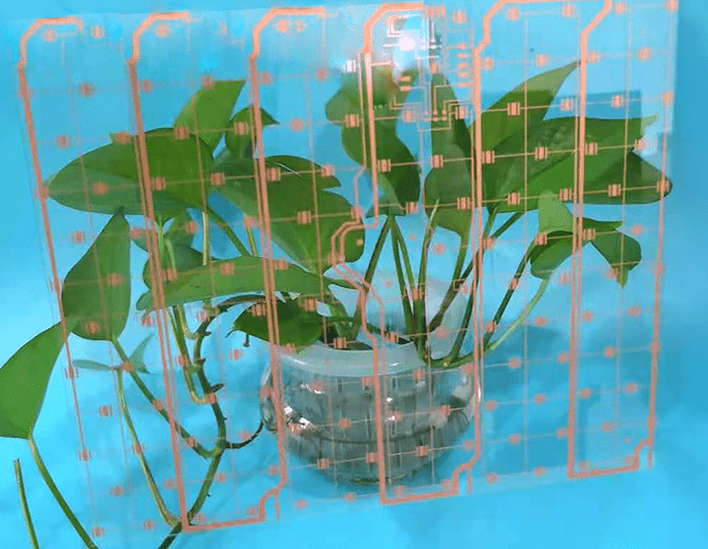
There may be no electrical advantage to making circuit boards on glass. However, this circuit builder can be used for various applications requiring transparency. For example, a set of downhills on this track type can be great. Also, note that acetone or hot water can remove copper trace resistance.
Types of Glass PCB
Different types of materials are used as elements for making PCBs and glass substrates. For example, different materials have different properties to ensure performance under certain conditions. Below are different types of glass PCBs.
● Epoxy glass PCB
This material is widely used in microelectronics, advanced manufacturing, electric light sources, optical quartz crystals, and infrared heaters. The major downside of this is its low thermal coefficient, which many people do not know how to form.
● Sapphire crystal circuit board
Glass PCB with sapphire crystal has excellent thermal properties. Exceptional thermal protection and chemical resistance, and infrared conductivity make it an attractive material. PCB amplifiers are chemically inert because of their unusual structural and electronic properties.
● Temperature Glass PCB
The glass recycles this type of tempered glass. It is strong and durable, so it’s hard to make or break. It is a very strong material, compressing up to 125 MPa. In addition, the mechanical properties of tempered glass PCB are also good. The glass will not break if a steel ball weighing 1 kg is dropped from a height of 1 m.
Tempered glass PCBs are sometimes used in far-infrared and infrared military devices, such as infrared and far-infrared scopes, night vision camera systems, and night vision cameras, among other devices.
Advantages of PCB Glass
Although glass PCB has no electrical advantages, it has many other advantages. With a 360-degree light-emitting body and transparent glass invisible wire finish, transparent glass circuit boards are used in LED, 5G, LCD, and other applications. Currently, glass PCBs are widely used for major applications like LED lights and other sophisticated lighting options.
- Low deformation rate
- Flat and transparent
- Heat-resistant and tear-resistant
- It does not require a heat sink.
- No light attenuation
- Stable Connection
- 360-degree illumination beam
- Chemical resistance
- Ability to work again after being faulty
- No Shocks
Limitations of Glass PCB
Glass PCBs are fragile. So it makes sense to manage them. He needs extra care and management guidance. Once it’s broken, it’s hard to fix, if not impossible most of the time.
The size of the object is also taken into account. Glass PCBs are small and light, making them ideal for confined spaces. So making a large-size glass PCB will not be beneficial in most cases.
How to Keep Glass Circuit Boards Quality
- CIP certification: Check if there is an IPC certification for any glass PCB you buy. This shows that the PCB manufacturer has the license to manufacture.
- Control procedures: To ensure the quality of the glass PCB, establish a well-controlled scope of the method.
- Component management capabilities: Every important component must be properly placed, and safety measures must be implemented.
- Evaluate the assembly: Carefully install the PCB. It is better to use the automatic system.
- Productive workplace: Manufacturers must guarantee well-designed, high-tech work areas
How to Choose the Best Glass PCB Manufacturers
- The manufacturer must have extensive experience and knowledge in the PCB manufacturing industry.
- Excellent customer service
- The industrial infrastructure meets the standard.
- Best product quality
- Proficiency with technology
- Profit of goods
- Ability to meet deadlines
Where Glass Substrate Printed Circuit Are Used
- LED display
- 3D printer
- Solar panels
- Optical device
Components to be used in Glass Pcb in Terms of Need
- Resistor
- Capacitor
- Inductor
- Diodes
- Crystal Oscillator
- Transistor
- Integrated Circuit
- Transducer
- Voltage Controller
Conclusion
Clear glass substrate circuit boards are rapidly entering the printed circuit board industry. Let’s say you are a manufacturer of communications, medical or military equipment. Then it’s time to focus on the shine and benefits of glass and find ways to use it in your device. Glass substrate circuit boards are undoubtedly beautiful; they have high heat resistance, making them suitable for high-temperature environments.
However, to ensure you do not make a mistake that may turn out to be a costly one, you need the help of an experienced contract manufacturer, and that is where Hillman Curtis comes in!
