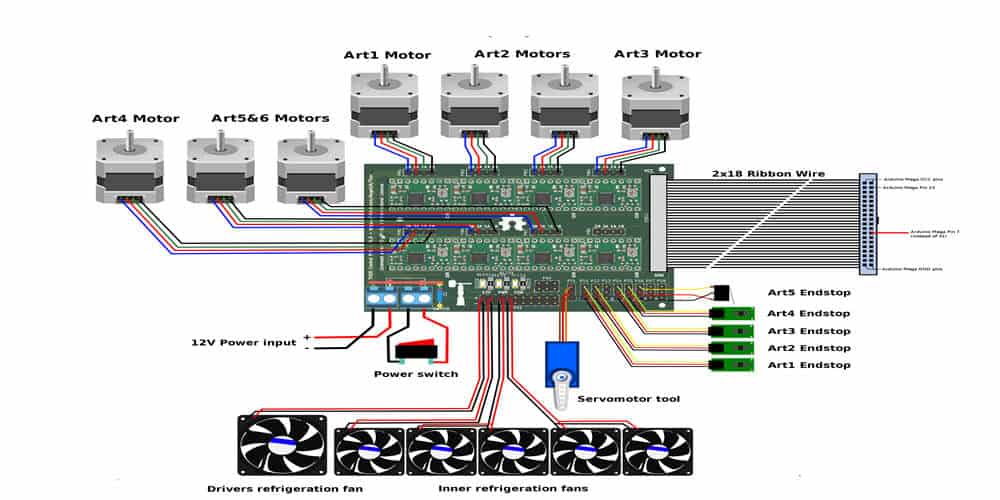
Among the most fundamental skills for PCB developers is the ability to wire together a circuit board. To a large extent, the system’s performance depends on how well Layout is able to apply and validate the various high-speed layout theories that have already been proposed. For this reason, wiring plays a crucial role in the development of high-speed PCBs.
For the reasons that it calls for a lot of time, effort, and design expertise. Single-sided board wiring, double-sided PCB wiring, and multilayered PCB wiring are all types of PCB wiring. There are a variety of potential problems that could arise throughout the wiring process itself. So, I’ll go over some of my own personal experiences and solutions. We can analyze its rationality and give some strategies to optimize.
What is Printed Circuit Board Wiring?
Like PCBs, printed wiring boards are a crucial part of any electronic equipment. In the early 1950s, they first made their appearance. This was the fundamental component of all electrical cases.
Printing as many circuits as possible into a given area of the board is an essential element of every PWB. This measure is known as component density. So many different kinds of packing methods developed as a result. Methods like Chip on Board and CSP are among them.
The surface-mount components are also small. They are also a common component of PWBs. This allows for the highest possible component density while safeguarding the device’s electrical, thermal, and signal quality to some degree.
There are also a variety of materials that can get used as PCB substrates. Among the many formats available, FR4 is by far the most popular.
Major Factors Affecting the Performance Wiring of Printed Circuit Boards
There is a risk that the functionality of PWBs will get compromised. These are the primary considerations.
1. Speed of Operation of PCB Wiring
The speed at which electronic components can get operated is an essential consideration in the interconnection architecture of PWBs. Furthermore, the dielectric constant of the substrate material of a PWB is inversely related to the signal speed proportion.
The electrical performance of a system is best maintained when the time it takes for a signal to travel from one point to another, termed propagation time, gets minimized. This time is directly proportional to the length of the conductors. Strip lines and micro-strips are usable on PWBs when the frequency required is greater than 25MHz.
2. Power Consumption of PCB Wiring
A rise in power consumption is inevitable as the number of gates and clock speeds both increases. For high-speed switching circuits, it is crucial that the ground-return current flow be optimally directed. Additionally, multilayered printed circuit boards require a unique ground plane (PWB). The purpose of doing this is to provide a smooth current flow with minimal resistance. As an added requirement, there is a need for a novel bus bar mechanism. This is also the preferred method for high-power circuits.
3. Thermal Management
However, PWBs are inefficient at dissipating heat. Since the power consumption of the PWB generates heat, you must be careful while employing ways to dissipate that heat. Utilizing metal slugs, heat vias, conducting planes, and heat sinks in PWBs are all excellent methods.
Difference between PWB and PCB

Listed below are some key distinctions between PWBs and PCBs:
· Components
Amongst the most notable distinctions between a PCB and a PWB is that the former refers to a board that contains only the wiring, while the latter refers to a board that contains all of the circuitry. In contrast, a plain board is what a PWB is all about.
This means printed circuit boards purchased as PCB are fully functional. They’re ready to get integrated into various electronic gadgets. In addition, PWB is useful for pointing out the early stages of circuit board manufacturing. Also, it exemplifies the value of a circuit in simple electronic applications.
· Area & Location
Depending on the context, you might hear any one of these words getting used in one of two distinct ways. Regarding the American electronics manufacturing sector, for instance, either word is acceptable.
The term “printed wiring board” was popular at the time. The electronic industry was in its infancy during this time period. Printed wire boards were the appropriate word or phrase for these circuit boards from the very beginning of the industry because the majority of the connections on these boards were from one point to another.
When circuit board technology advanced to a new level, PCBs were developed and introduced. Initially, the usage of this composite noun was limited to internal purposes. However, the term “circuit” proved to be quite helpful, especially in light of the fact that the PCB previously made unavailable complicated functionalities available.
Also, because of the widespread availability of PCBs made possible by technological improvements, PWBs are now only used in electronics’ pre-production stages.
Without any additional parts, printed wire boards are considered the design substrate. Printed wire boards have cutaways in addition to the etching bit. This paves the way for soldering both into and through electrical components.
It takes more than just soldering components onto a board to make a printed circuit board; chemical and physical processes get involved.
This was inspired by the design of printed circuit boards, which is crucial to the smooth operation of the program.
7 Steps to Determine PCB Wiring and Layout

Before beginning wiring, it’s important to perform a thorough analysis of the design and fine-tune the tool program to ensure the final product meets all specifications.
· Number of Circuit Board layers
The number of layers for wiring and the size of the circuit board both need to get decided on early in the design process. The impedance and wiring of printed lines are directly influenced by the number of cabling layers and the method of STack-up. The printing line width and stacking mode required to realize the intended aesthetic are both affected by the board size. The price gap between single- and multilayered plates has decreased to the point where it is preferable to utilize more circuitry layers and ensure that the coating of copper is uniform from the start of the design process onward.
· Designing rules & restrictions
The routing tool must adhere to the proper guidelines and limitations in order to accomplish the routing process. Each distinct type of signal line must get assigned a priority in order to meet its specific requirements. Stricter regulations apply to higher priorities. The effectiveness of routing tools is significantly affected by regulations concerning the layers limitation, mutual effect of signal lines, parallelism, the maximum limit of vias, and the width of printing lines. Effective wiring necessitates a thorough examination of design needs.
· Components Layout
According to the DFM guideline, there are constraints on the element layout that must be met in order to achieve the best printed circuit board assembly process. The circuit needs to get adjusted to allow for automatic wiring. This can only happen if the assembling department allows for components to get moved about. The Layout will get affected by the constraints and rules that have been established. The automatic circuit builder doesn’t consider multiple signals at once. The wiring instrument can accomplish the designer’s wiring goals by only inputting the limitations of cabling and the layers of the changeable signal line.
Take the power line design as an illustration: Firstly, the power decoupled circuits should not get located in the power section of the PCB; doing so would have a negative impact on the circuit’s bypass function and would have led to interference due to pulse currents in the ground wire and power line. Secondly, the power source should be provided from the final phase to the forward phase, and the power filtering capacitor of this component should be located at the end of the power source. For some critical current paths, such as the current, the gap must get placed on the printing wire in the design, and the current must get measured or disconnected during the testing and debugging process.
In addition, it’s worth noting that the controlled power source is typically laid out on a different PCB. If the power source and the circuit are both on the same PCB, the ground wire should connect them, or the power source and the circuit should not share a common ground.
The reason is that this type of cabling is not only prone to interference generation but also makes it impossible to isolate the load for routine maintenance without severing the entire printing wire and so causing damage to the circuit board.
· Designing Fan out
To allow for circuitry reprocessing, online inspection, and inner connection during times when extra connections are needed, each port of the surface-mounted device must have a minimum of one hole during the fan-out designing phase.
When using automatic wiring equipment, it is best to have the distance adjusted to 50 mils so that the optimum printing line and hole size can get used. In order to achieve the greatest possible number of routing paths, you should employ the sort of hole that best achieves this goal. Circuit online testing can be performed throughout both the preliminary design phase and the final production phase if sufficient planning and foresight have been applied.
Grounding and power can have an impact on the fan out design and wiring, in addition to the online examination for the wire route and circuit that will get used to decide the kind of hole fan out.
· Manual wiring
PCB design currently and in the long term relies heavily on manual wiring. Automated wiring tools can’t do the job alone, so manual wiring is essential.
Forming the path while automatically wiring requires human wiring and configuring the chosen network.
The first step is to wire the essential signals. These signals get checked by the appropriate technicians and engineers when the wiring gets finished. After checking and repairing the lines, the wiring of the signal will occur automatically.
The ground wire adds anti-interference and co-resistance to the circuit because of its impedance. As a result, during wiring, no two points marked with grounded signs can get linked freely; doing so could result in hazardous coupling and disrupt the functioning of the circuit.
At very high frequencies, the wire’s inductance will be many times greater than its resistance. A certain HF voltage drop will get generated even by a little HF current on the cable at this moment. Thus, the PCB layout for HF circuits is as small as possible, reducing the length of the printed wire.
Parasitic coupling interference occurs when the operating frequency is high. Furthermore, capacitance and mutual inductance between printed wires interact with one another. One way to reduce interference is to shorten the length of the cable carrying signals between floors; another is to set up the circuits on each floor in sequence so that signals never cross; a third is to ensure that the wires in any two adjacent panels are either perpendicular to one another or crossed; a fourth is to ensure that no two panels get placed next to one another. In order to achieve shielding, it is necessary to leave as much space as possible between parallel signal wires on the board or between power lines and landlines.
· Automatic PCB wiring
During wiring, it is important to maintain control of certain electrical factors. For example, lowering the distributed inductance, which might affect the reliability of critical signals. Quality assurance for automated wiring is achievable by learning about the input variables of automated wiring toolkits and the effect of input variables on wiring.
In the automated signals wiring, standard practices should get implemented. The wiring tool may wire according to the expert’s concept design by establishing constraint requirements and prohibited wires area to restrict the layers employed by the received signal and the number of holes used. When the application’s defined rules and constraint conditions are in place, automated wiring will produce the desired outcomes. Back wiring won’t have any effect after the initial design work gets finished because of the fixes that will get implemented.
The number of wires needed is proportional to the number of underlying rules and the circuit’s complexity. These days, a 100% wired system is no sweat, thanks to the incredibly potent automated wiring tool at your disposal. However, manual wiring of the signal is necessary when the automated wiring equipment is unable to finish the job.
· Wiring Arrangement
There is a lot of wiggle room in the wiring for certain signals. We may now manually alter to decrease the number of openings and decrease the length of the signal wire after determining which wiring is fair and which is not.
Essentials and Tips for PCB Wiring
· Ground wire and power supply

First, a decoupling capacitor must get installed between the power source and the ground line. It’s important to connect the power source to the decoupling capacitor before connecting it to the chip pin. In most cases, decoupling capacitors have dual purposes. First, it supplies a surge of high current to the chip. Decoupling capacitors minimize the impact of power source noise on chips, and the noise from the chips does not affect the power source.
The power cord and grounding wire must get extended as much as feasible. The ground wire should get placed at a greater distance than the power source, with the signal wire coming in last.
Thirdly, the ground line can take up a lot of space on the copper foil, and the empty space on the printed circuit board can get wired to the ground.
· Digital & analog circuit
Digital and analog circuits, rather than circuits with a particular function, are used in modern PCBs. Because of this, we must guard against their influence in PCB wiring, particularly noise interfering with the earth wire. In reality, the frequency of digital circuits is quite high, while the sensitivity of analog circuits is quite high. HF signal circuits, however, should get kept much further away as possible from the delicate analog circuitry. This is why it’s crucial to keep analog and digital circuits apart.
· Trace corner treatment
A change in trace thickness is typically associated with a corner. When the diameter of a wire gets altered, there will be a change in its thickness, and this will cause some reflection. In the same way that changes and effects on the thickness of the line will be distinct depending on the corners used. The same holds true the other way around. Thus, signal strength considerations should guide the selection of the corner angle due to its complexity in PCB design and high-performance requirements. Fillet gets reserved for the most critical lines. The 45° angle is optimal for moderately sensitive communications.
DRC after PCB Design and Layout
In general, it is not a good idea to skip out on the final inspection stage of any project. In a similar fashion, once the PCB circuits are complete, the DRC must begin. We can’t be sure that the printed circuit board is up to par unless we check it thoroughly. Our checks get performed routinely in accordance with the following criteria:
1. Make sure the following conditions are reasonable. Line spacing, pad-to-line distance, line-to-through-hole distance, pad-to-through-hole distance, and edge distance should all get included.
2. Second, make sure there’s enough space between the ground line and the power wire.
3. Additionally, you should check the ground wire and power source to ensure they are securely connected and see if there is room on the PCB circuit to enlarge the ground wire.
4. Asking for optimal precautions with regard to the primary signal line is important. The output and input lines are clearly marked, the line length gets adjusted to its minimum, and a protective line gets installed.
5. Fourth, if the digital and analog sections have their own dedicated grounding connections.
6. Determine if the short-circuit signal is being caused by graphics that get added to the PCB afterward (like diagrams and notes).
7. Fix the shaky lines.
8. The addition of break-away strips to the printed circuit board, the adequacy of the solder mask in terms of both size and shape, and the pressing of character notes into the components are all steps that should get verified before moving on to the manufacturing phase. All these must get inspected thoroughly to guarantee the highest possible standard.
9. Determine if the power ground on multi layer boards is shrinking at the outside edge. Consider the potential for a short circuit caused by the uncovered copper layer of the power ground on the exterior of the board.
In conclusion, the aforementioned strategies and tactics are the sum of numerous experiences, making them well worth the time and effort required to study and put into action. If you follow those guidelines, you should be able to finish the PCB wiring in no time.
More significantly, you should exercise the highest level of care feasible independent of the PCB wiring and general Layout. After all, we wouldn’t want the finished items to go to waste because of anything as trivial as a typo.
Conclusion
Our article on PWBs, or printed circuit boards, ends here. We have defined it for you. We also went through its distinctions from PCBs. Feel free to ask questions about anything in the post that you don’t understand. Professionals with extensive knowledge in the area are here and ready to assist you.
