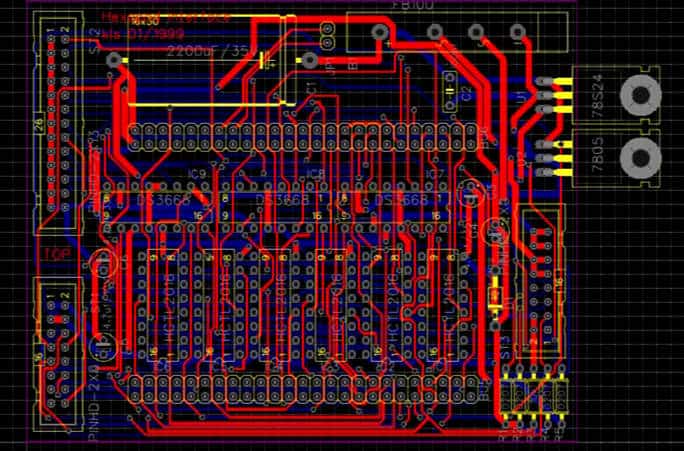
PCBs (printed circuit boards) are the backbone of electronic devices and equipment. Over time these components have evolved to fit the needs of consumers in the 21st century. These needs include compact portable devices that users can carry around easily. However, for manufacturers to satisfy this need, they have been forced to generate tiny PCBs which incorporate complex and dense circuitry.
Due to the complexity of the PCB circuits, now holes of Vias have become tricky to install. Holes function by forming an electrical connection between the PCB layers and corresponding requirement design of the PCB. These vias do not function well when not installed well, making the PCB useless. You should choose a good PCB manufacturer to ensure this does not happen to your PCB. You should also ensure that the engineers that design your PCB are perfect for the job. They should generate a steadfast design format that we can utilize in the PCB manufacturing process to ensure perfect results.
However, over time, most engineers have been having trouble generating reliable NC drill files and Gerber files during the designing phase, hence messing up the entire process. To ensure that this also doesn’t happen to your PCB design files, let us look at a couple of crucial things for you to understand Drill files and Gerber files.
A bit about Drill Files and Gerber Files
If you have never manufactured or had a PCB board, then you might not know about Gerber and Drill files. Most people think that, after designing a PCB design, all you have to do is send the layout and EAGLE schematic files to the manufacturer, and they deal with the rest. However, this is beside the case because, as we all know, many PCB designing software exist. And even though these software solutions provide the same service, they utilize generic native file formats for their software. Due to this, manufacturers and PCB fabricators find it challenging to handle all these file formats simultaneously. Therefore, most of them term the endeavor as impossible to handle.
For programmers to solve this problem, they configured every PCB designing tool to support an intermediary production file known as Gerber files and Drill Files.
Gerber Files
These files describe the copper found on each layer of your Printed Circuit Board in a format that a CAM (computer-aided Manufacturing System) can understand.
On the invention of Gerber files, PCB manufacturers utilized them to provide directives to photoplotter machines. These photoplotter machines would then generate an image of your PCB design using light directed on an unexposed film. The manufacturers would then utilize this image to develop the PCB with ease. Nowadays, Gerber files offer directives to laser plotting equipment. The laser plotting machine then generates a picture of all vias, holes, and traces on your board layout.
Drill Files
Gerber files, though efficient, do not handle Drill Hole information. So for the manufacturer to know where they are supposed to place every drill hole in your PCB, you have to send them a separate file known as a Drill File.
A Drill File or an NC (Numeric controlled) Drill file is a secondary file format that bears information on the Drill holes’ positions and sizes. Sometimes people refer to NC Drill files as Excellon Files due to the routing and drilling machines built by Excellon.
These two files are crucial in the PCB design and manufacturing stages; messing them up could ultimately damage the PCB circuitry.
NC Drill File Formats
Nearly every PCB designing software available today can easily generate Drill Files. However, the ordinary Drill File format is known as Excellon. Above being around for so long, the Excellon file format has also played a major role in PCB routing and drilling equipment. Due to these reasons, manufacturers began to utilize the file format as an industry standard.
The Excellon file format is utilized greatly in CNC routing and drilling since it can easily specify machine definition information like speed and drill feed.
Formats and types of Gerber Files
The simple trick that Gerber files utilize to function is that they associate every file you generate with a unique layer on your PCB layout, each of which bears a unique file extension. Autodesk Eagle, in particular, supports the following file formats:
- .cmp – for the top copper
- .pls – for the bottom Silkscreen layer
- .plc – to cater to the top Silkscreen layer
- .sts – to represent the bottom solder mask
- .stc – for the top solder mask
- .sol – to cater to the bottom copper
Gerber Formats
Gerbers come in two variations:
- Gerber RS-274X
- Gerber RS-274D
The Gerber RS-274D variation is older than the X variation and utilizes two files per layer on a PCB. On the other hand, the Gerber RS-274DX, the newer variation, holds all the data about a PCB layer on one file. Therefore, when managing your PCB design information, you have a simpler time working with the Gerber RS-274X.
How to Create a Drill File utilizing the Altium Designer

In the Altium Designer interface, click on file, then click on Fabrication output on the interface that follows. After that, click on NC Drill Files, which will direct you to the Drill files set up dialog. While on this dialogue box, you need to specify a few selections that include:
- The Drill Format
- Your Coordinate positions
- The Trailing/Leading Zeroes
Drill file Units of data can either be millimeters/inches. However, your chosen unit should coincide with the ones used in your Gerber file.
Regarding formats, only three selections are currently available: 2:3, 2:4, and2:5. The 2:3 format bears the lowest resolution. On the other hand, 2:5 format bears the highest resolution. Therefore, before deciding on the format to utilize on your PCB, you should first consult your PCB manufacturer. Doing so will help you know which format can be supported by the manufacturer’s equipment.
Zero suppression
Zero suppression simply drives drill files to be neat and fit, and they mostly rely on the board designer’s application convenience and habits. When designers pick suppress leading zeroes, they must remove the starting zeros. However, when they choose suppress trailing zeroes, then the ending zeros have to be ejected.
Coordinate positions
Coordinate positions come in two alternatives:
- Relative origin
- Absolute origin
The designer can choose any of the two alternatives according to their specific requirements. Moreover, their coordinate positions should coincide with those utilized in their Gerber files.
You can still pick other items which suit your project in the dialogue box. After making your choices press OK, and an NC file will be generated automatically.
Generating Drill Files in Cadence Allegro
Generating Drill files using Cadence Allegro differs from generating Drill files in Altium Designer. First of all, Cadence does not utilize Excellon files. Due to this difference, you must set up concerning parameters while working with Cadence. To do so, click on Manufacture, and on the new window, click on NC. Then, on the page that comes next, click on NC Parameters; this will bring out an NC parameter Dialogue.
You must define the Excellon Format and output file in the Parameter dialogue box. When choosing the output type code, you should go for Ascii as it is relatively newer compared to EIA.
To create a Drill File using Excellon, you should choose Enhanced Excellon Format.
Zero suppression
As per NIL suppression in Cadence, you should go for trailing zero suppression or leading zero suppression based on your project’s needs. However, you should also ensure that your chosen format coincides with the format used in your Gerber.
After determining your items, click on the close button to close the parameter dialogue box.
To head on to the Drill Dialogue Box, click on Manufacture, then click on NC on the page that emerges. From the NC page, look for NC Drill and click on it to open the Drill file dialogue box.
After choosing the necessary items in this dialogue box, press the drill button to generate a drill file. Save the drill file in the default file folder. You can retrieve it from this location.
Generating NC Drill Files using Autodesk
When working with Autodesk, you should pre-install crucial files known as CAM files on your computer.
How to Install a CAM File
You can store CAM files anywhere. However, you must ensure that you can find the files easily when needed. For example, if you are a Dropbox fan, you can use it to store the file and retrieve it whenever you need it, using multiple computers.
Cam Files, Eagles Versions
CAM files come in several Eagle versions, which include:
- 8.6.0 to 9.6.2 – Eagle uses JSON formats to handle CAM files in this category.
- 7.2 to 8.5.2 – starting from Eagle 7.2, old Excellon devices output 2.5 format rather than 2.4 for drills.
- 5,6,7.1,older eagle versions.
CAM files exist in three different variations, Windows, MAC OS, and Linux. To install CAM files, you must locate the files that match the type of computer you use.
Once you have the CAM files in place, you can now move on to generate your Drill Files.
Steps to Generate your Drill Files
Click on the CAM file Processor tool (the CAM Icon), which is at the very top of your processor. If you can’t find this option, you can still access the tool by clicking on the file, then CAM processor.
Once the CAM processor window opens, you must load your drill CAM jobs onto the platform to start the process. To do so, click on file, open, and finally job. Then, in the EAGLE CAM folder, choose the Excellon.cam.file and select open.
Once this process is complete, you will have a single create NC drill data tab on your Autodesk. The tab will collect information from layers 45 Holes and 44 Drills. Next, click on process job to create your Drill file. And just like that, you have your Drill file.
Autodesk EAGLE software stores the NC in your project folder. You can easily access the files via the Autodesk EAGLE Control Panel.
Different board designers have varying preferences when choosing the PCB designing tool to use. However, even though these software tools differ in terms of file exporting, the parameters used in their NC drill files must coincide with those used in their corresponding Gerber files.
Generate Gerber Files
While working with Autodesk, you must first install CAM Files to quickly generate a Gerber File using the tool.
Steps to Generating the Gerber Files
In this example, we shall load up CAM files of the Gerber RS-274X variation, the most recent and efficient variation.
Open the Print Circuit Board layout’s file (usually in .brd file format) in your Autodesk Eagle software’s control panel.
Next, click on the CAM file manufacturing tool, which is present at the very top of the interface.
When you click on the CAM file processor, you’ll find that no CAM task has been loaded. Hence to load your task, all you have to do is:
- Click on file, then open, and finally select process job button
Once you have done this, navigate to your Eagle Compute Aided Folder and select gerb274x.cam file, and click on open.
Once this is complete, you will note that there is addition of new tabs to every CAM file you generate with this task. Click on Process Job to generate all the Gerber files related to your project. And you are done! Generating Gerber files is that easy.
With that simple process, you can generate all the Gerber format files required for your project by your manufacturer. Moreover, if you open the Autodesk Eagles Control Panel, you will see all the new generated Gerber files arranged in list format alongside the existing project files.
Conclusion
Over time, many PCB designers have had issues generating Gerbers and NC Drill files. What’s even more tragic is the fact that these files are pretty crucial, and they play a major role in the development of PCB. Therefore, messing these files up ruins the PCB entirely. However, by following this article’s guidelines, you are sure to get each of these files right every time.
